Client Created Profiles
All providers are able to create new profiles as services expand. Below is a guide detailing how to create a profile.
2.
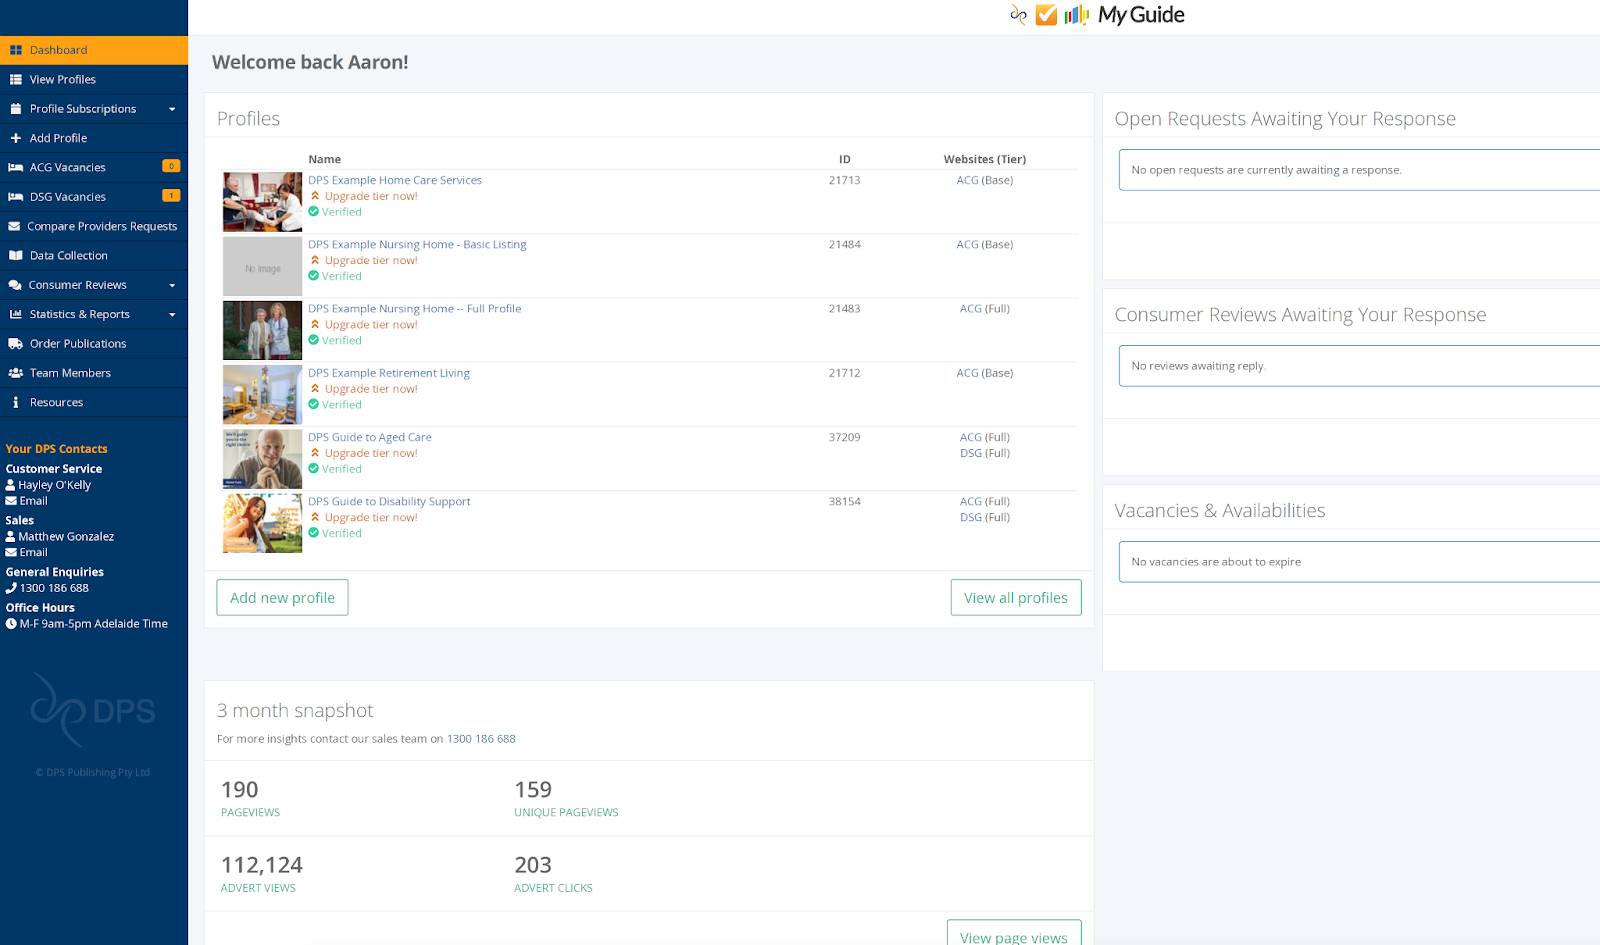
When you first login you will see your Main Dashboard Page. This page has a brief snapshot of your profiles, any Open Requests Awaiting Your Response, Consumer Reviews, 3 month snapshot and your Vacancies and availabilities. On the Left Hand side of the Dashboard there is an itemised Menu and there is the contact information for the Customer Service Representative, Sales Representative allocated to your profiles as well as the contact information for the DPS Publishing office.
3.
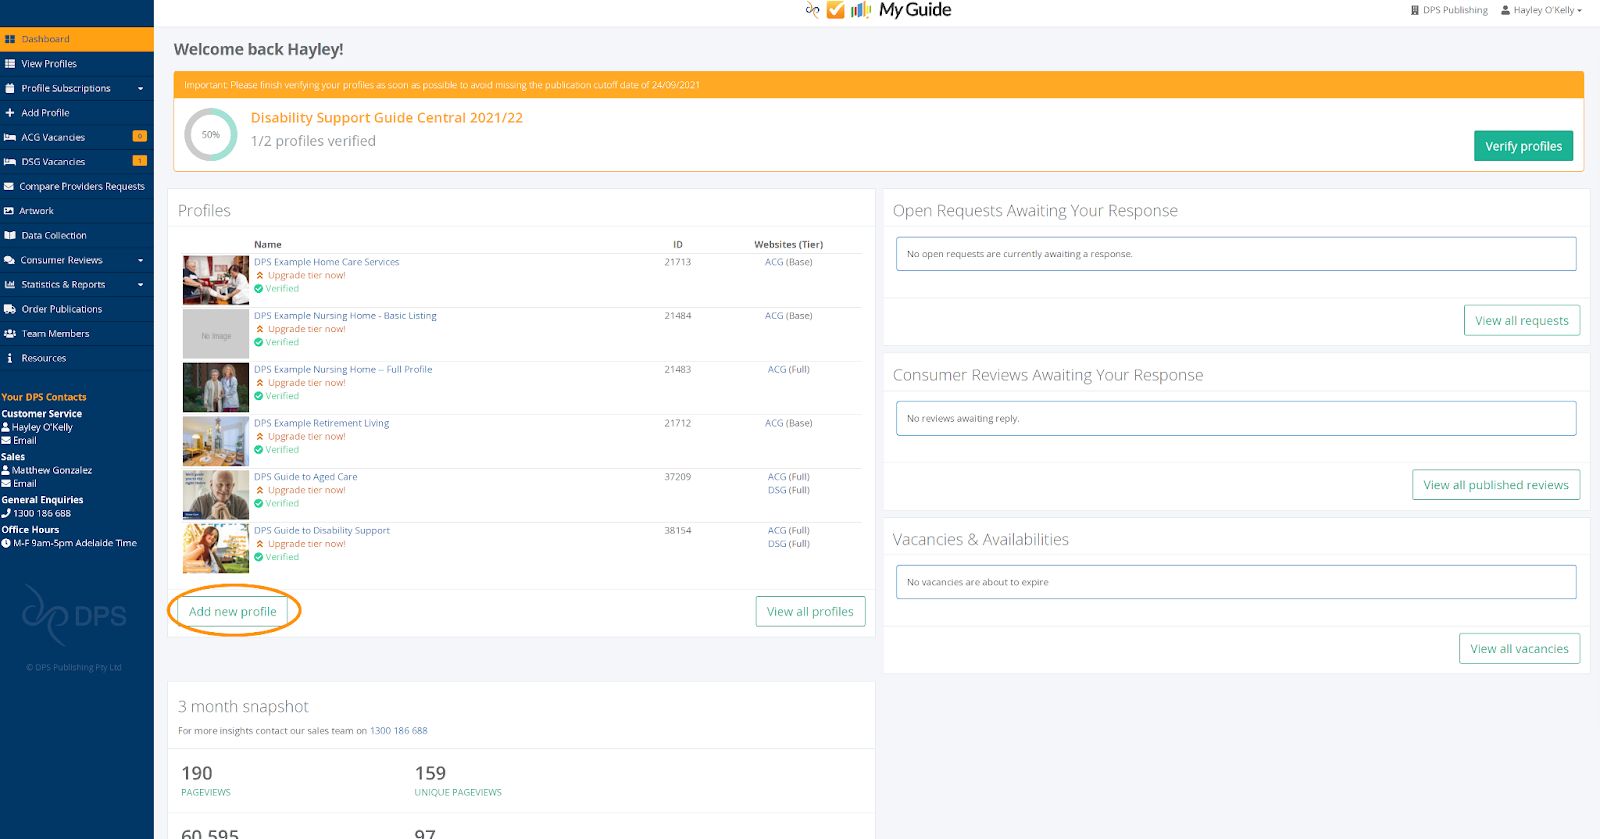
To create your new profile select the Add new profile button which is on the bottom left corner of the Profiles box.
4.
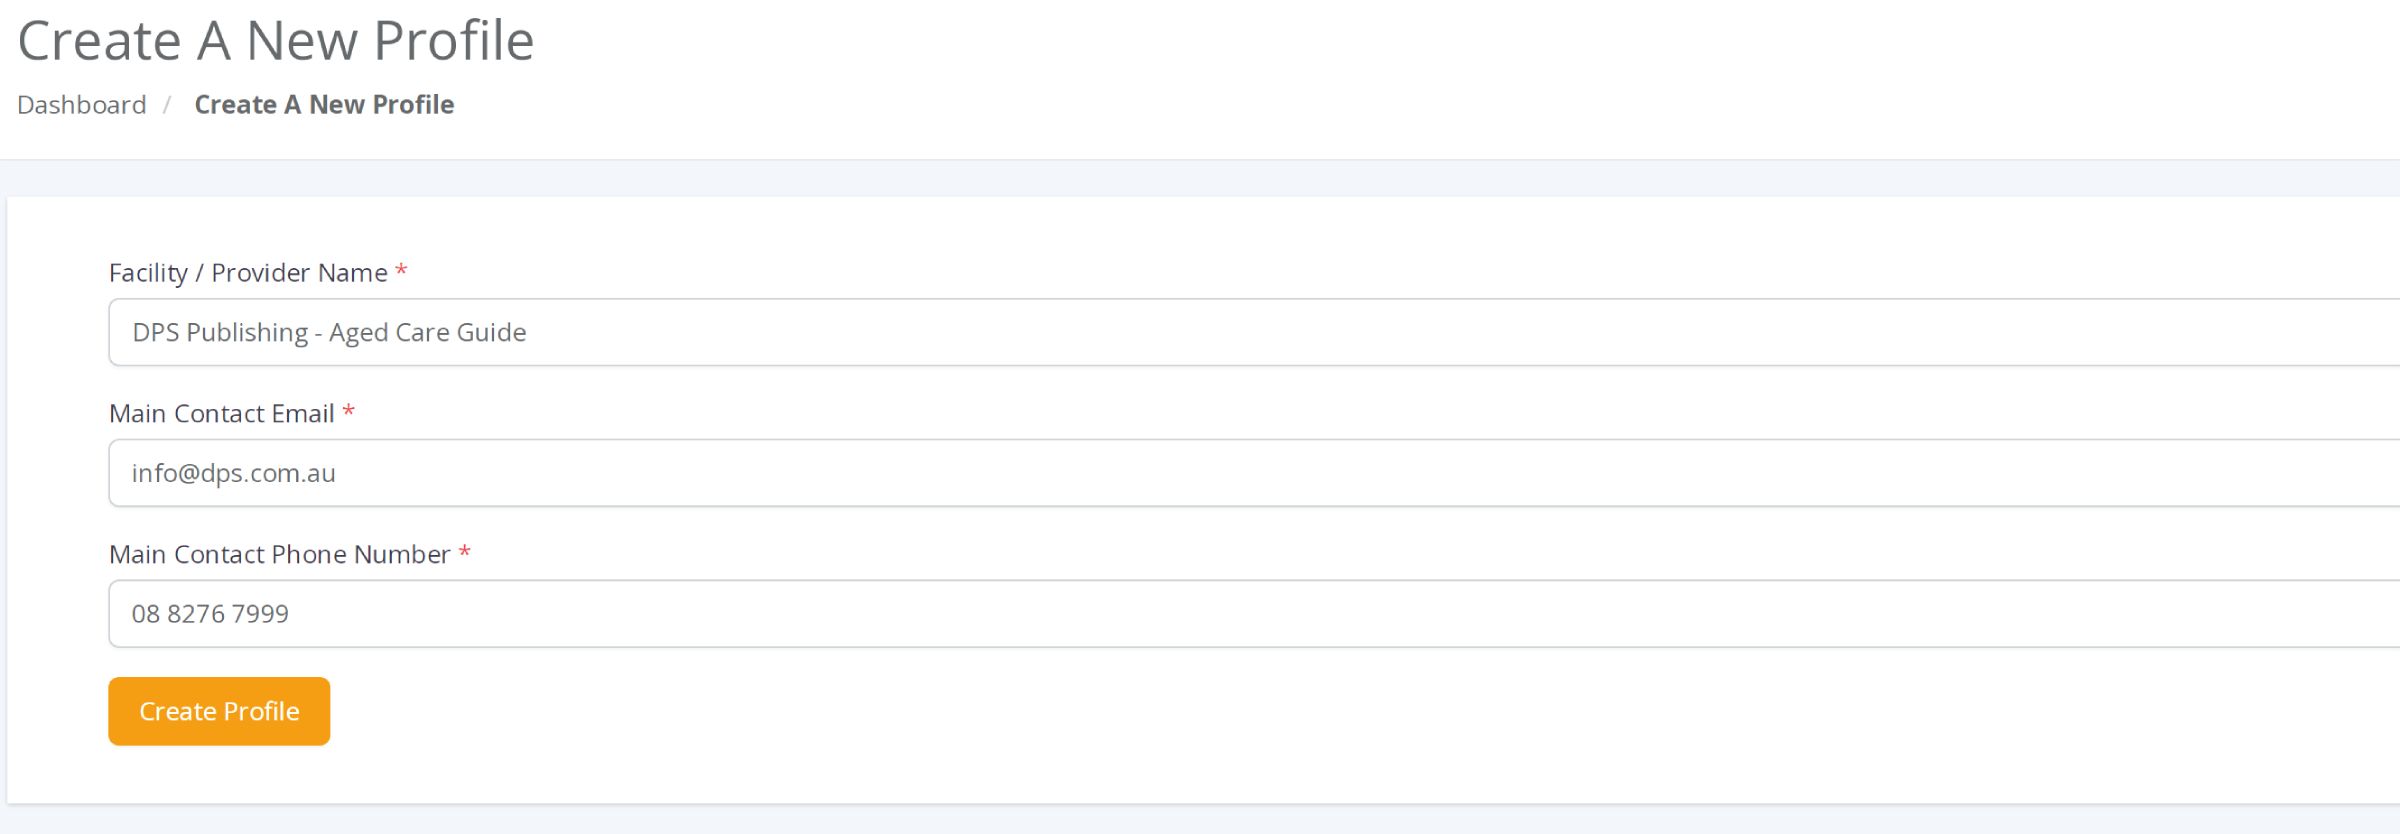
This will take you to a page where you can fill in the basic information for your new profile. Once all three areas have been filled in click on the Create Profile button.
5.
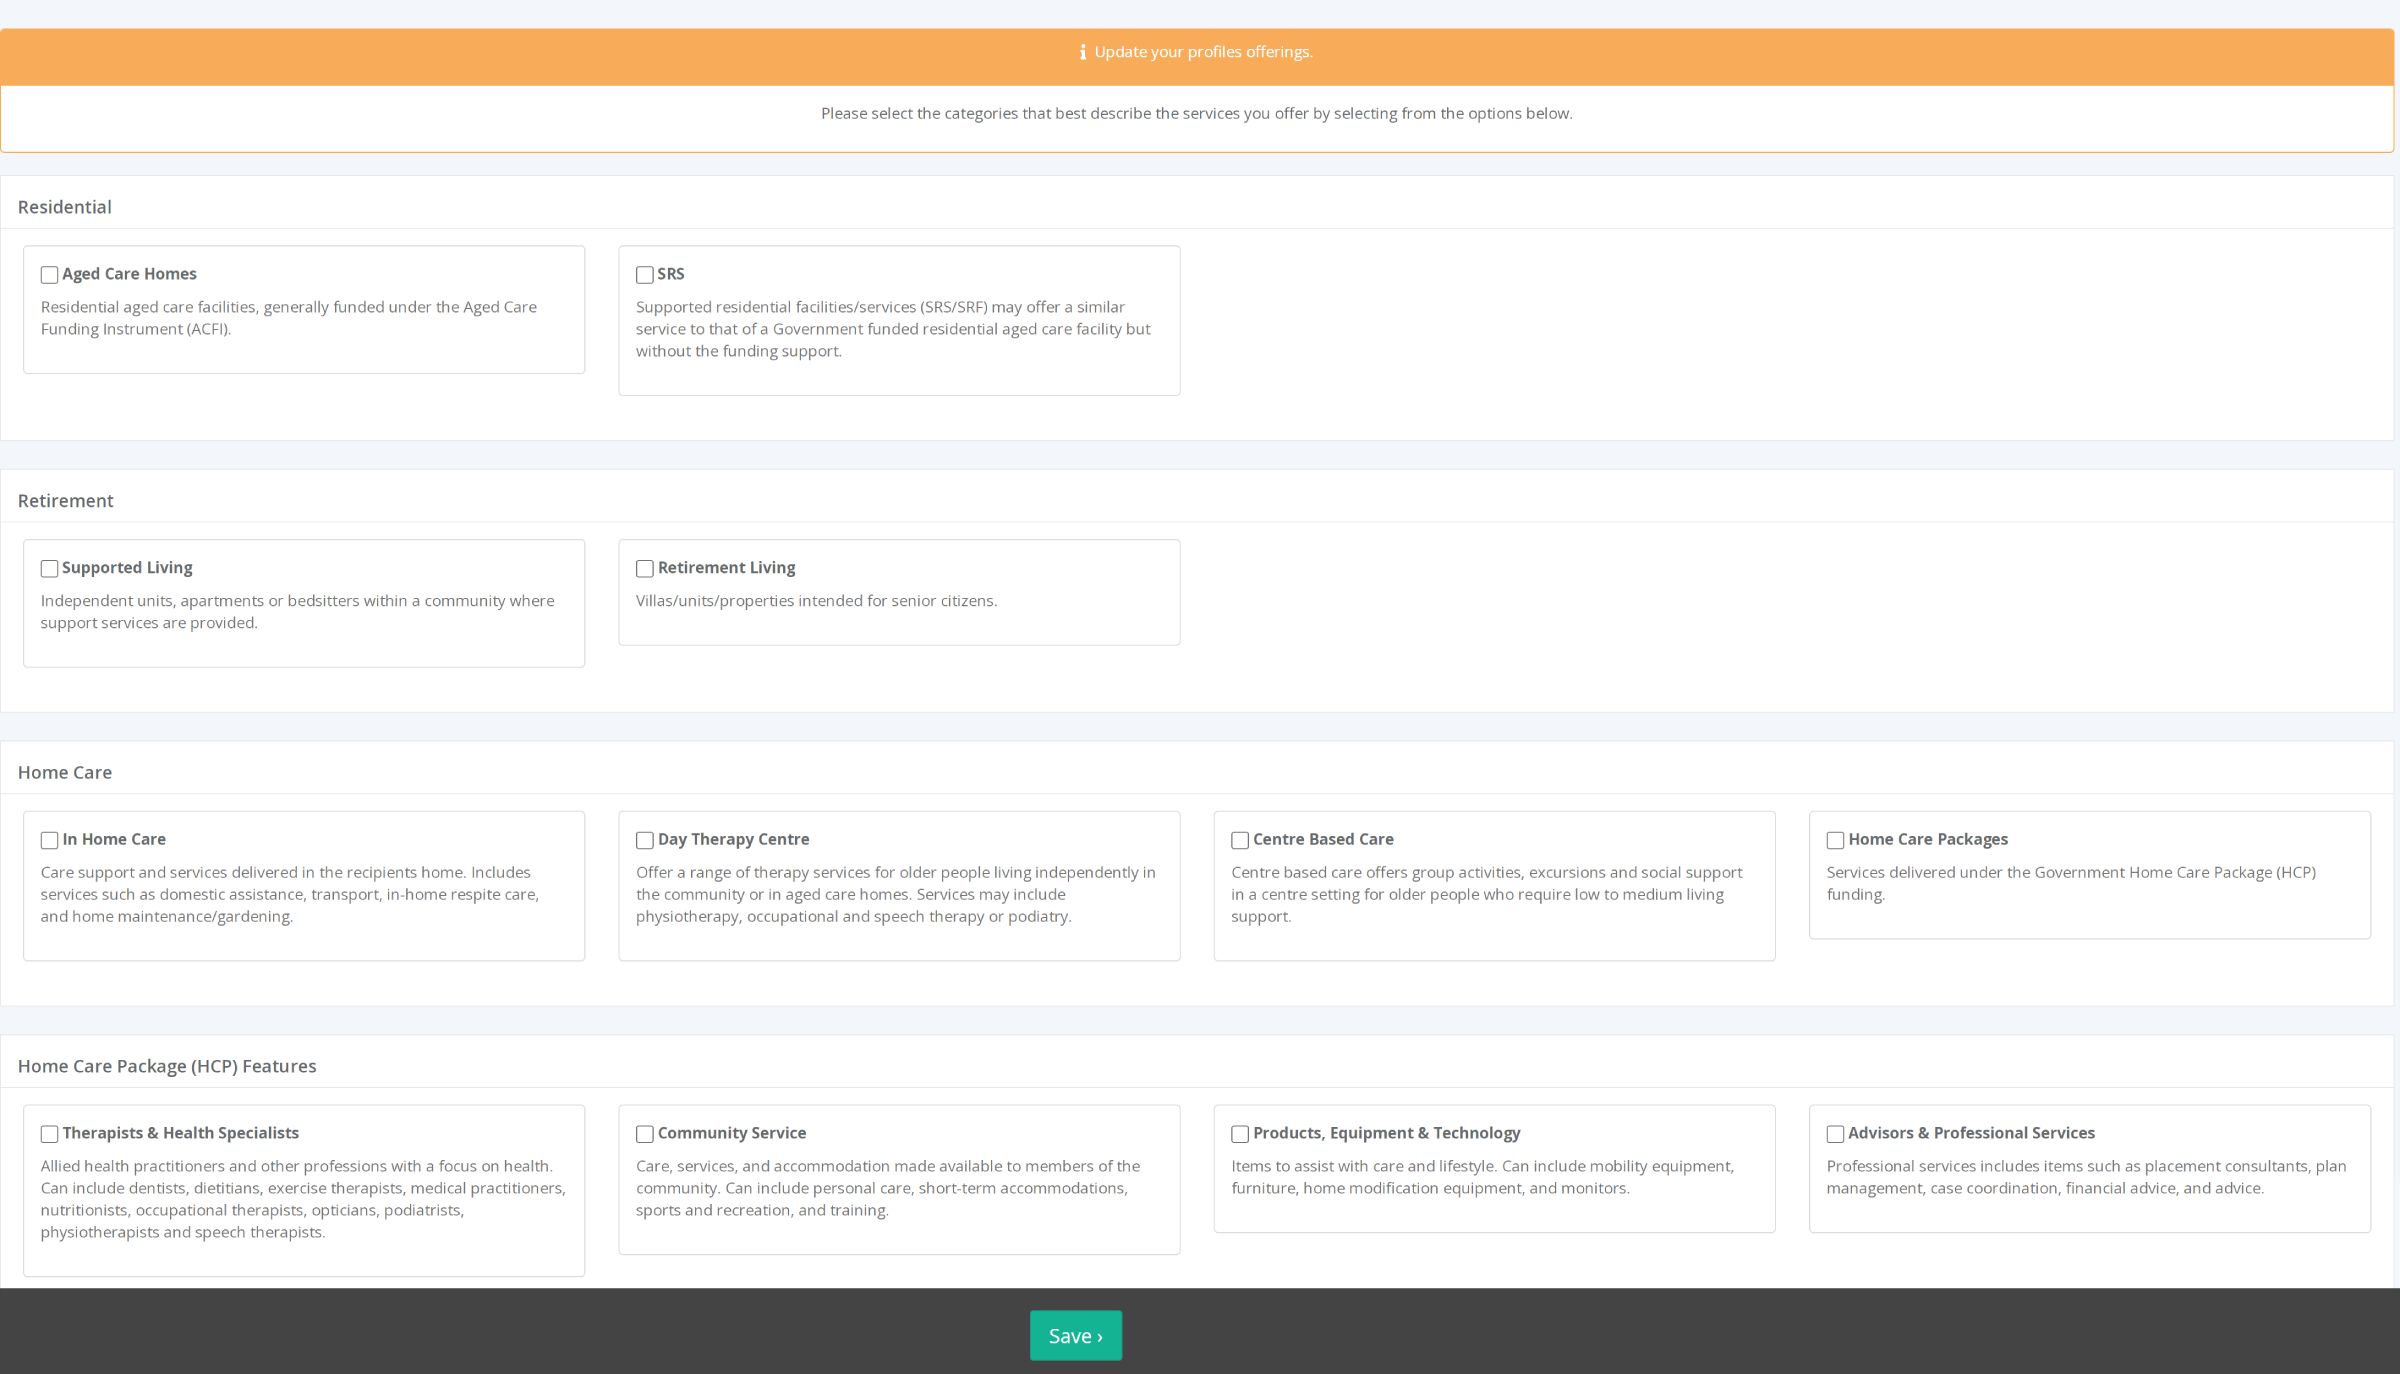
This will take you to a list of all profiles within your Organisation. Find your new profile and click on the name. This will take you to where you can add more detailed information about your services. The initial screen is where you will need to add at least 1 category that describes your services, once you have selected a section press the green Save button.
6.
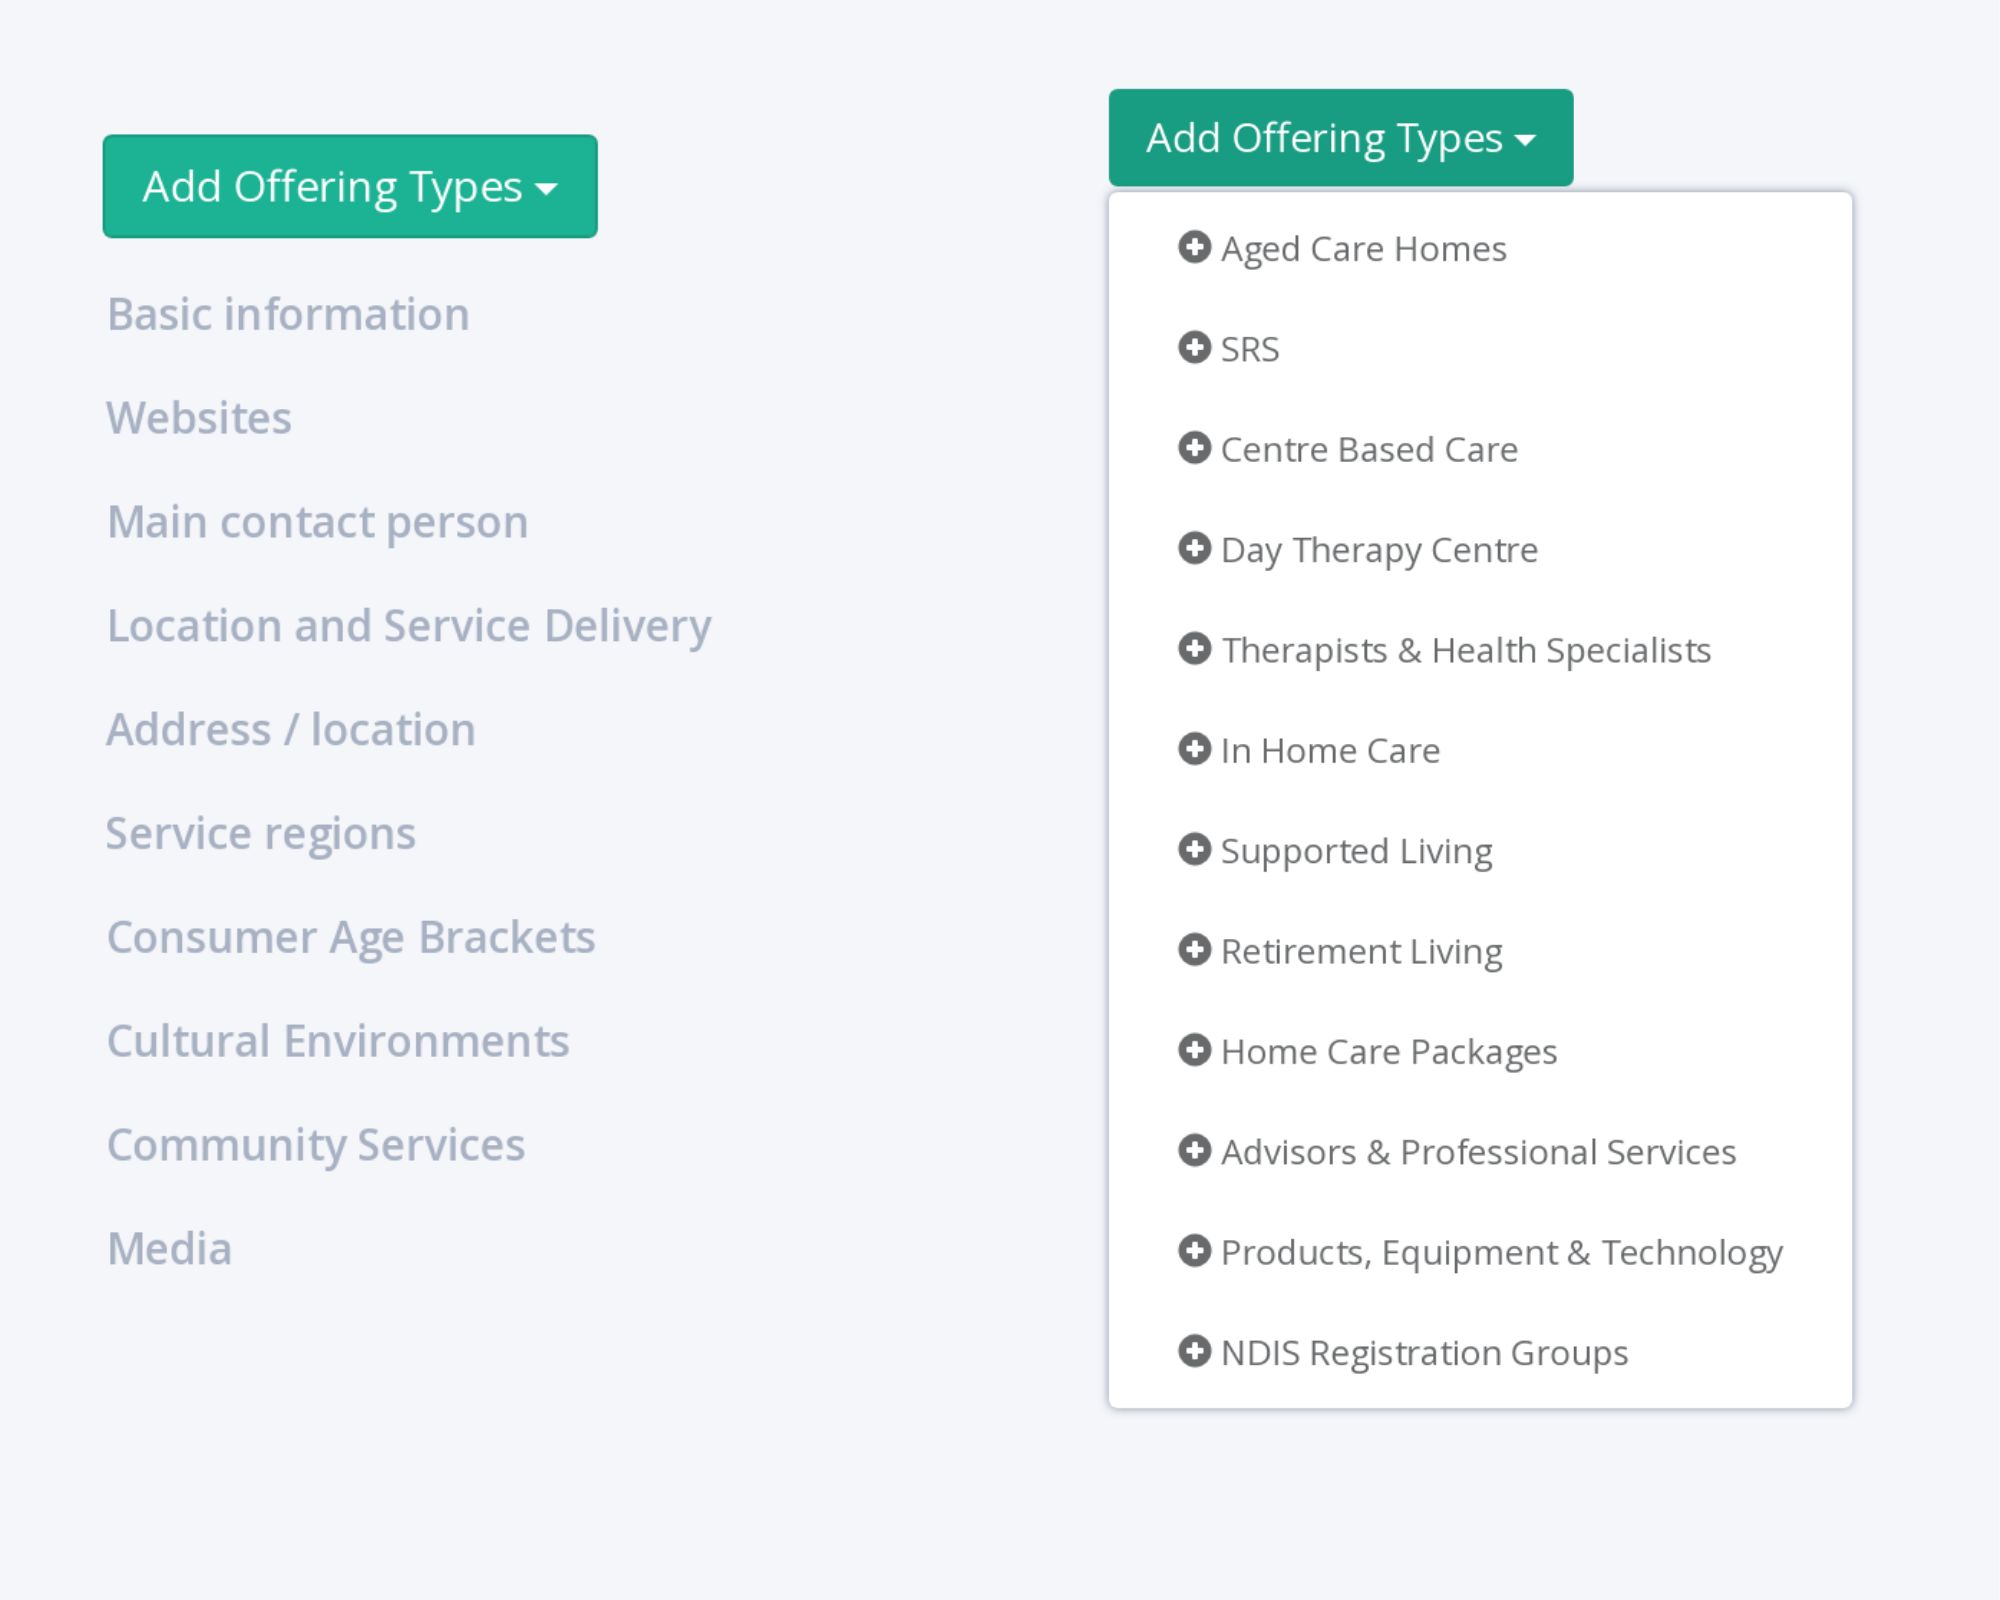
The next screen is where you are able to update your information at any time. On the right hand side of the screen there is a menu, the top selection, Add Offering Types, this is where you are able to add more categories that describe your services.
7.
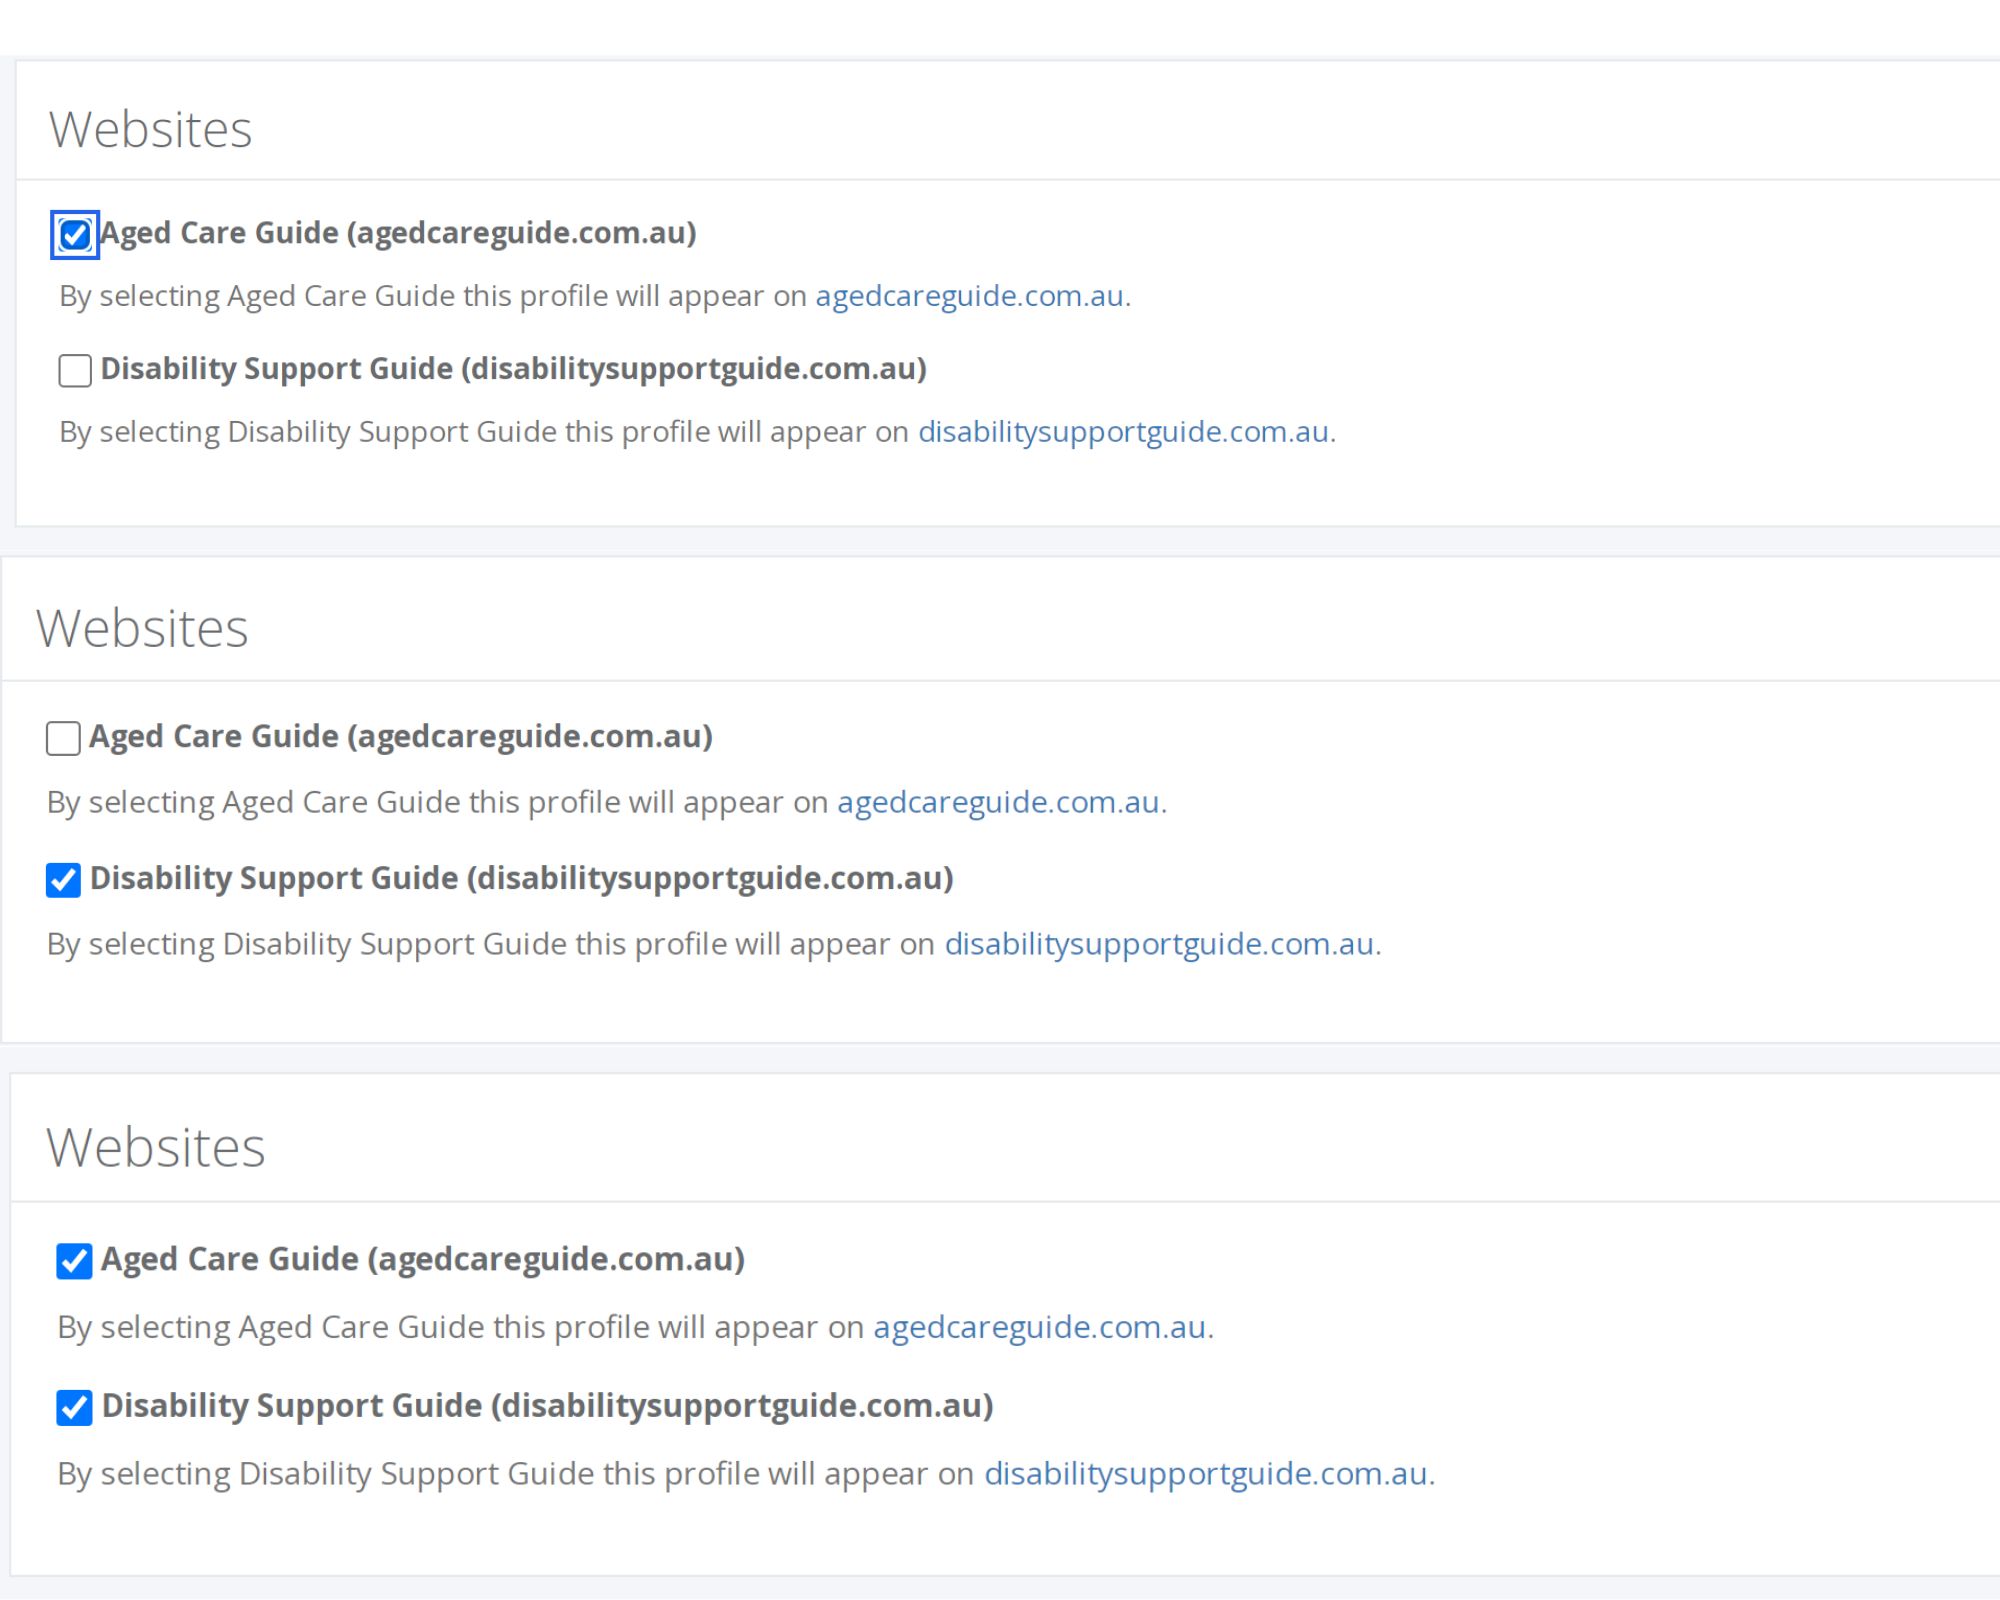
Once you have the offerings you need you can fill out the profile with as much relevant information as possible.To ensure your profile is visible properly on the website there are some sections that must be completed. For example; you have the option to select which of our two websites, or both if they apply, your profile will be visible on.
8.
You also have the option of Location and Service Delivery options. You can select On-Location, which means that your clients come to your facility ie a showroom, shopfront, Aged Care Home or Retirement Village. The other option is Service Region, which means that you either go out into the community or your service is accessed over the phone or a mail service ie a carer to someones home or an online shop.

9.
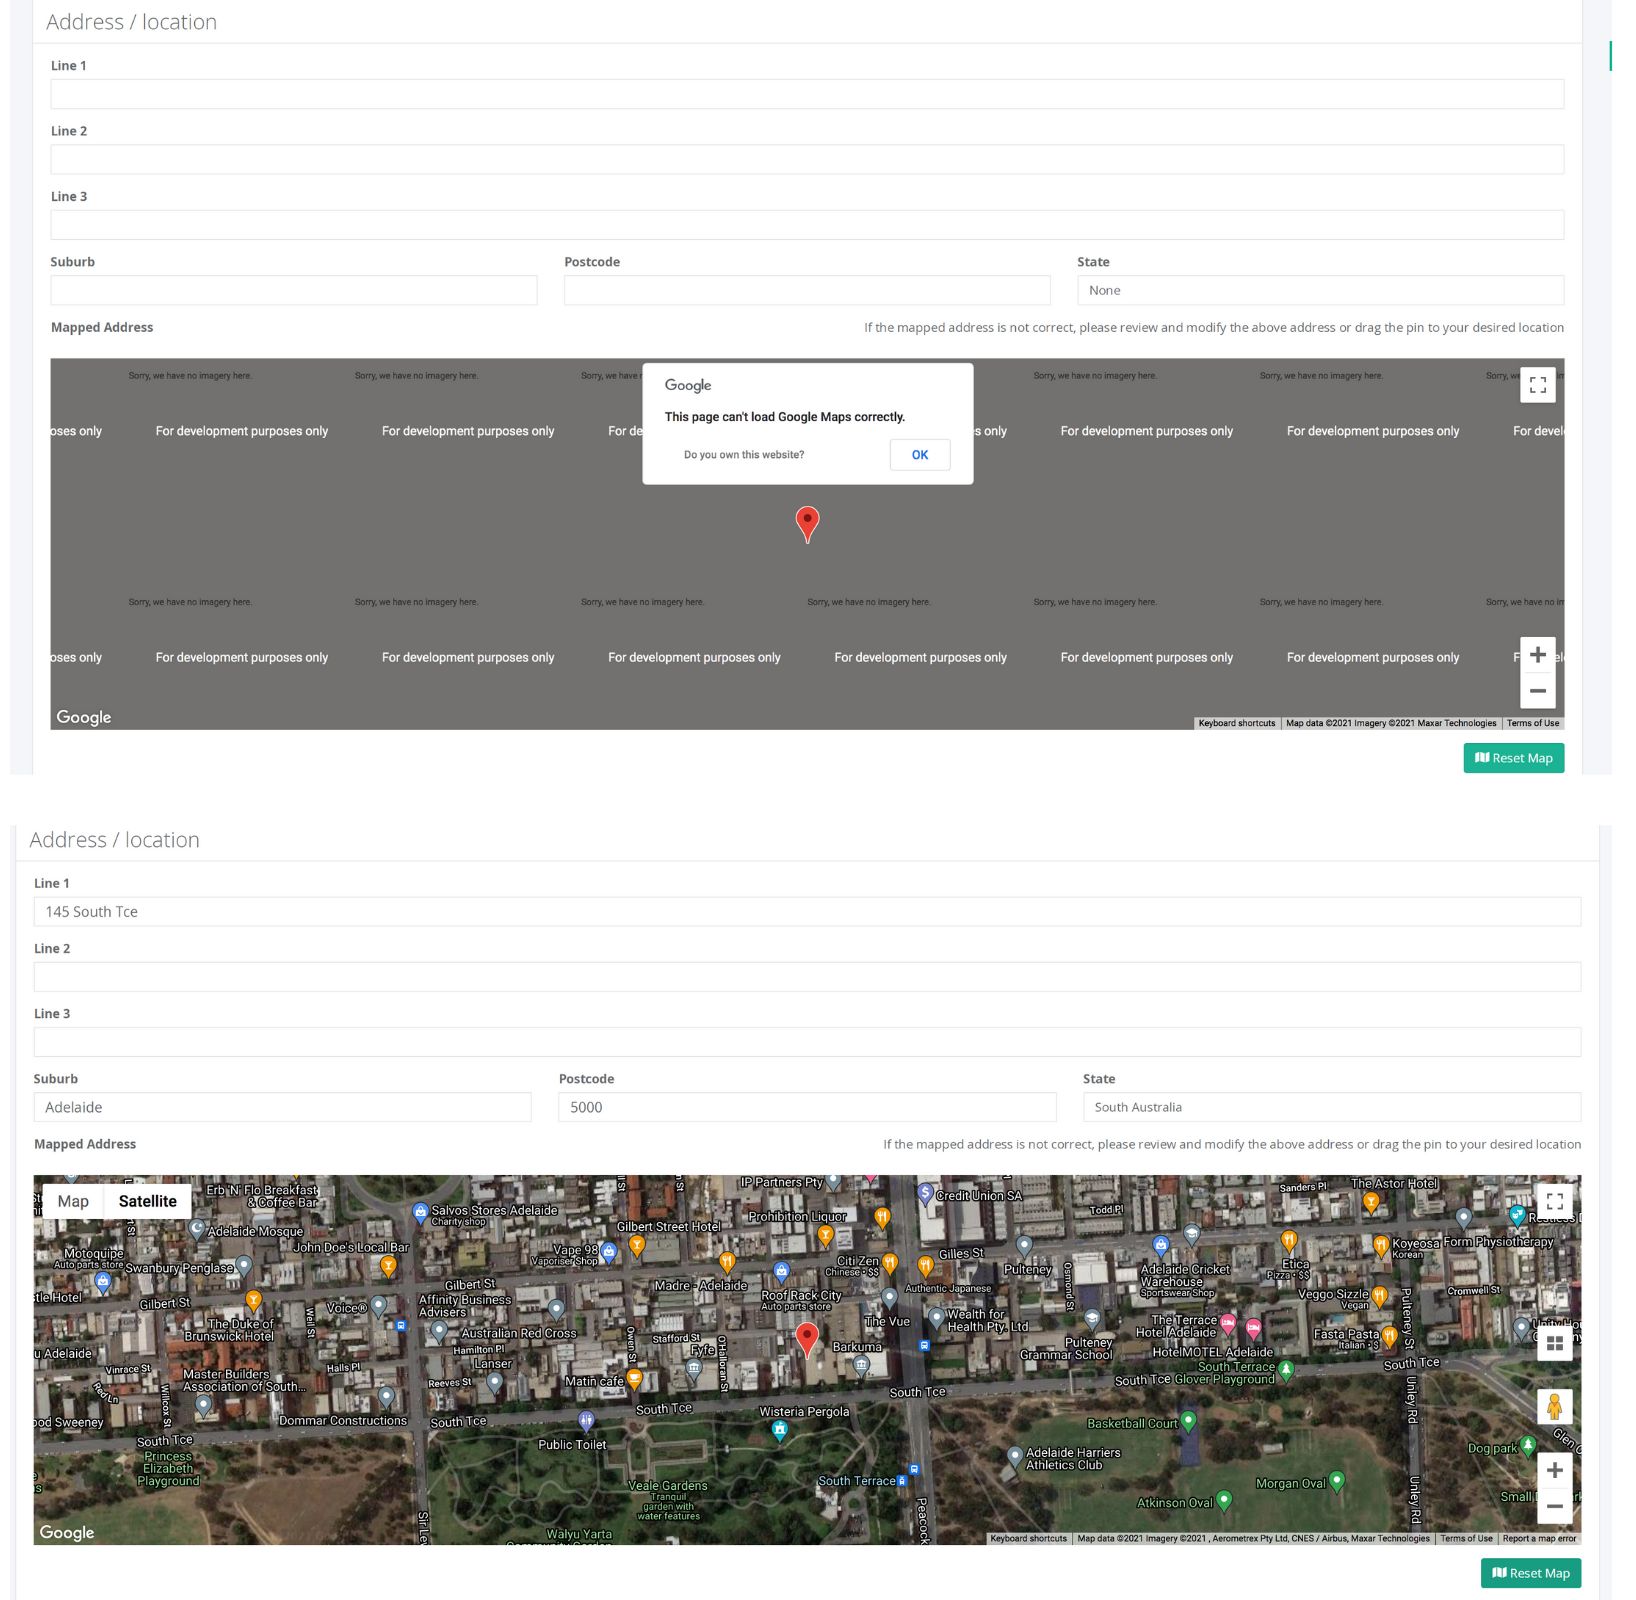
If you select On-Location you will need to add an address location. Once you have added an address, and saved your profile your address will be shown on the map. In order for the website to be able to list your services there must be at least a Suburb, Postcode and State listed.
10.
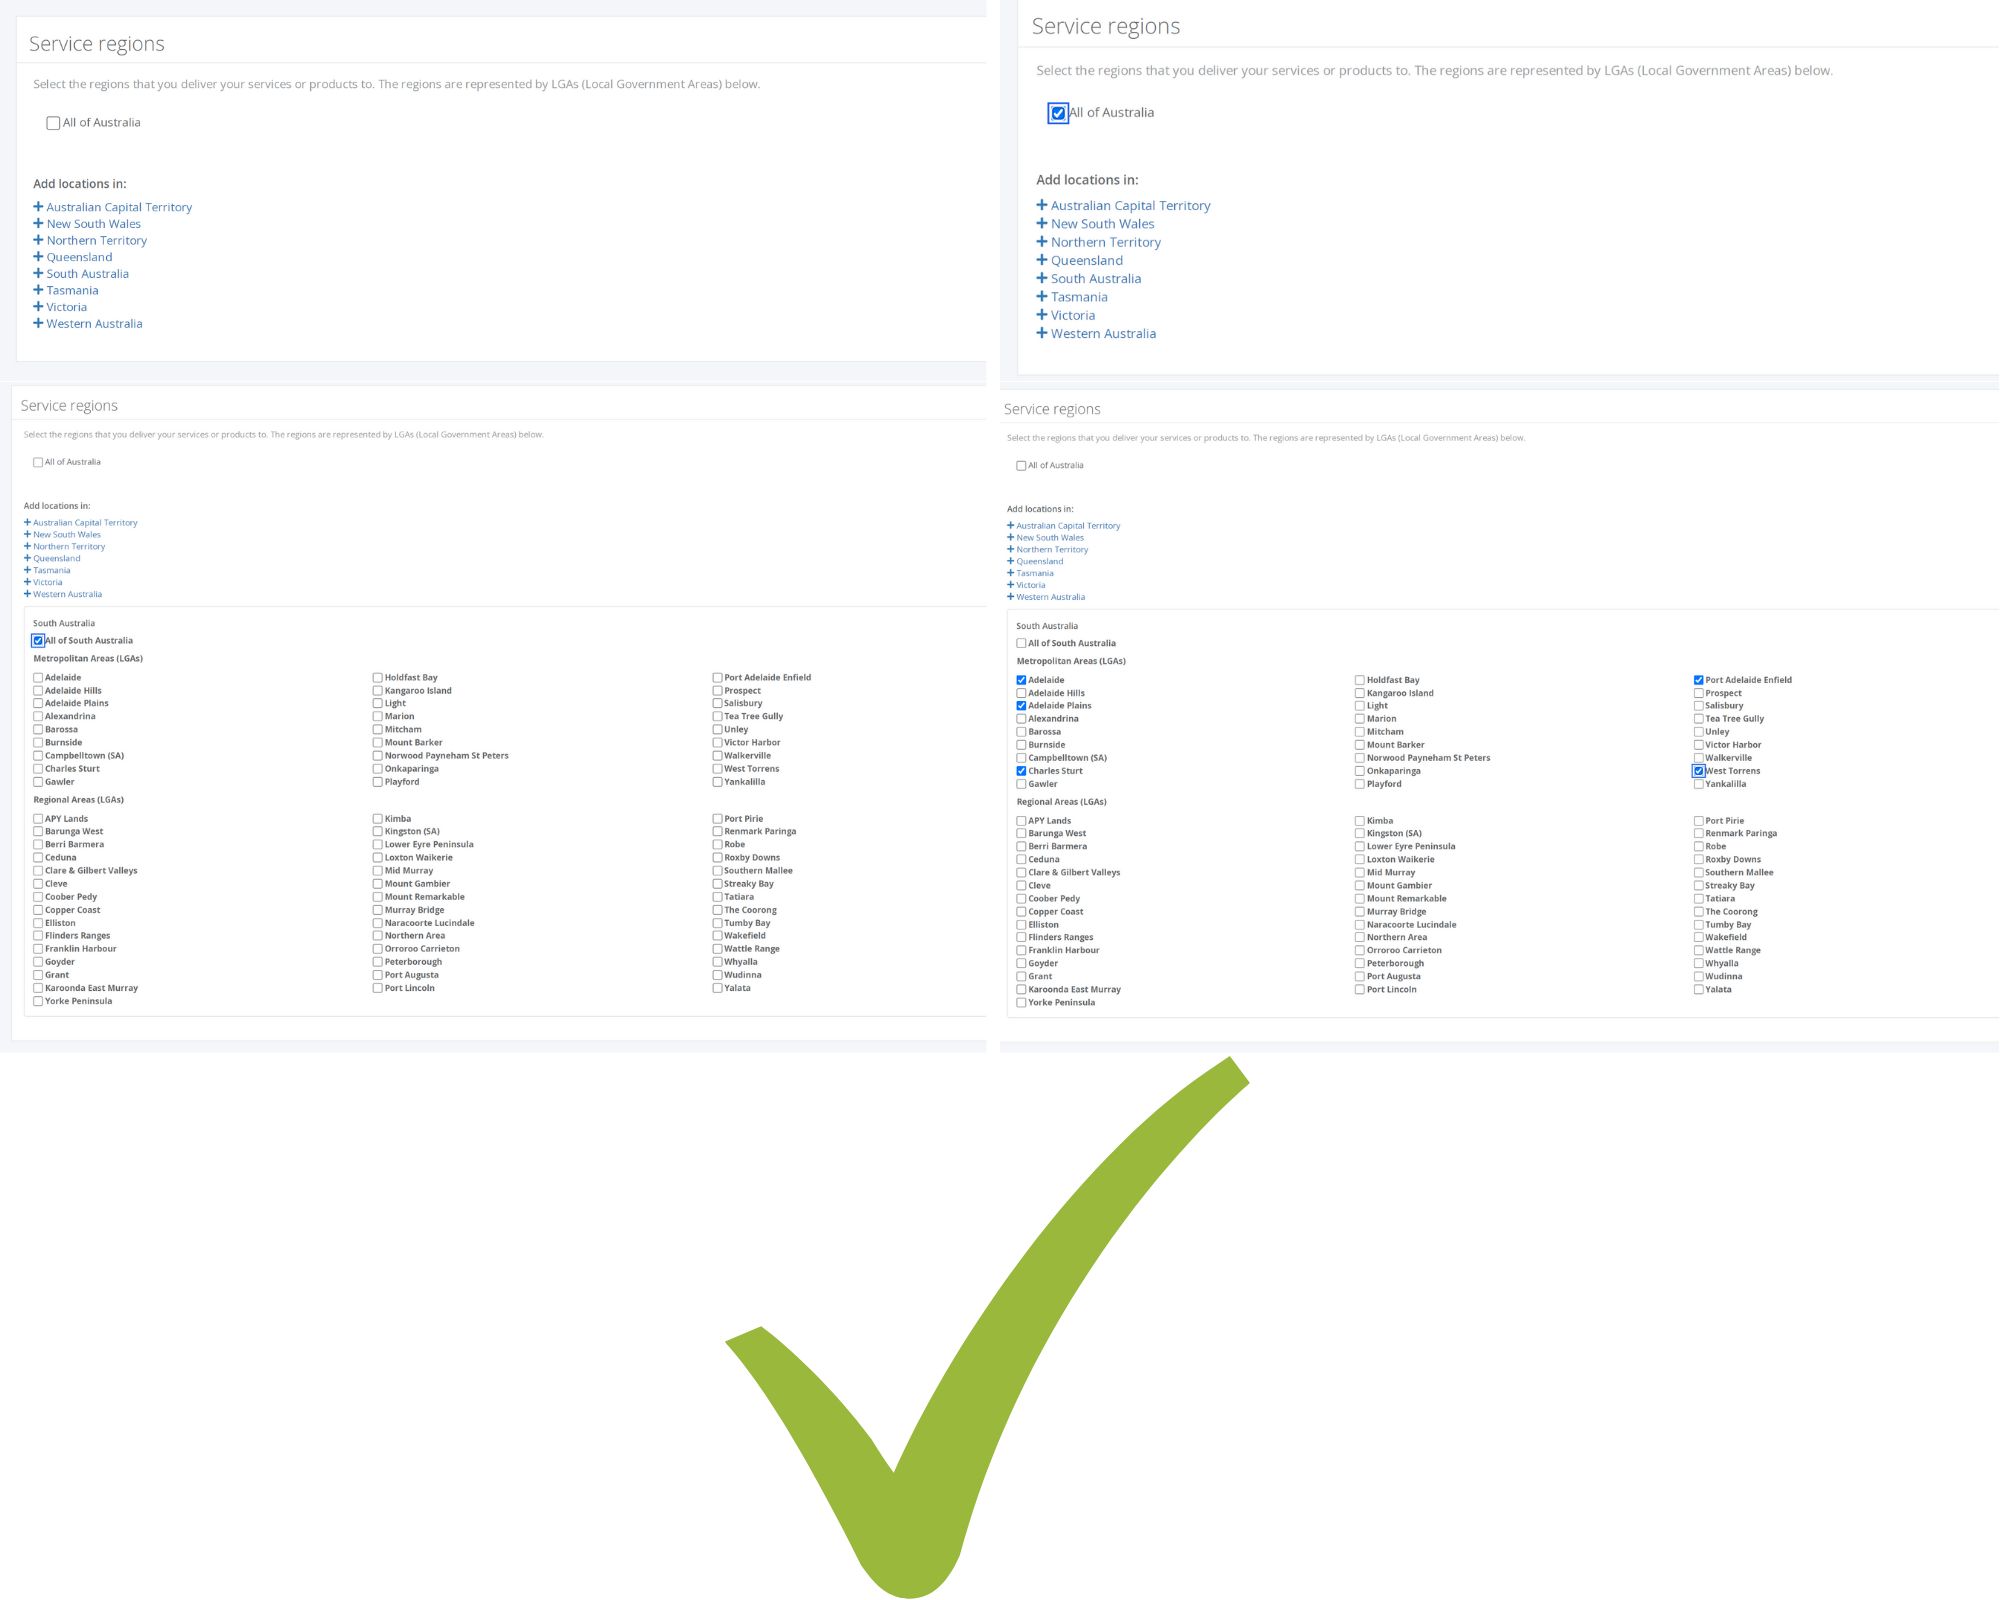
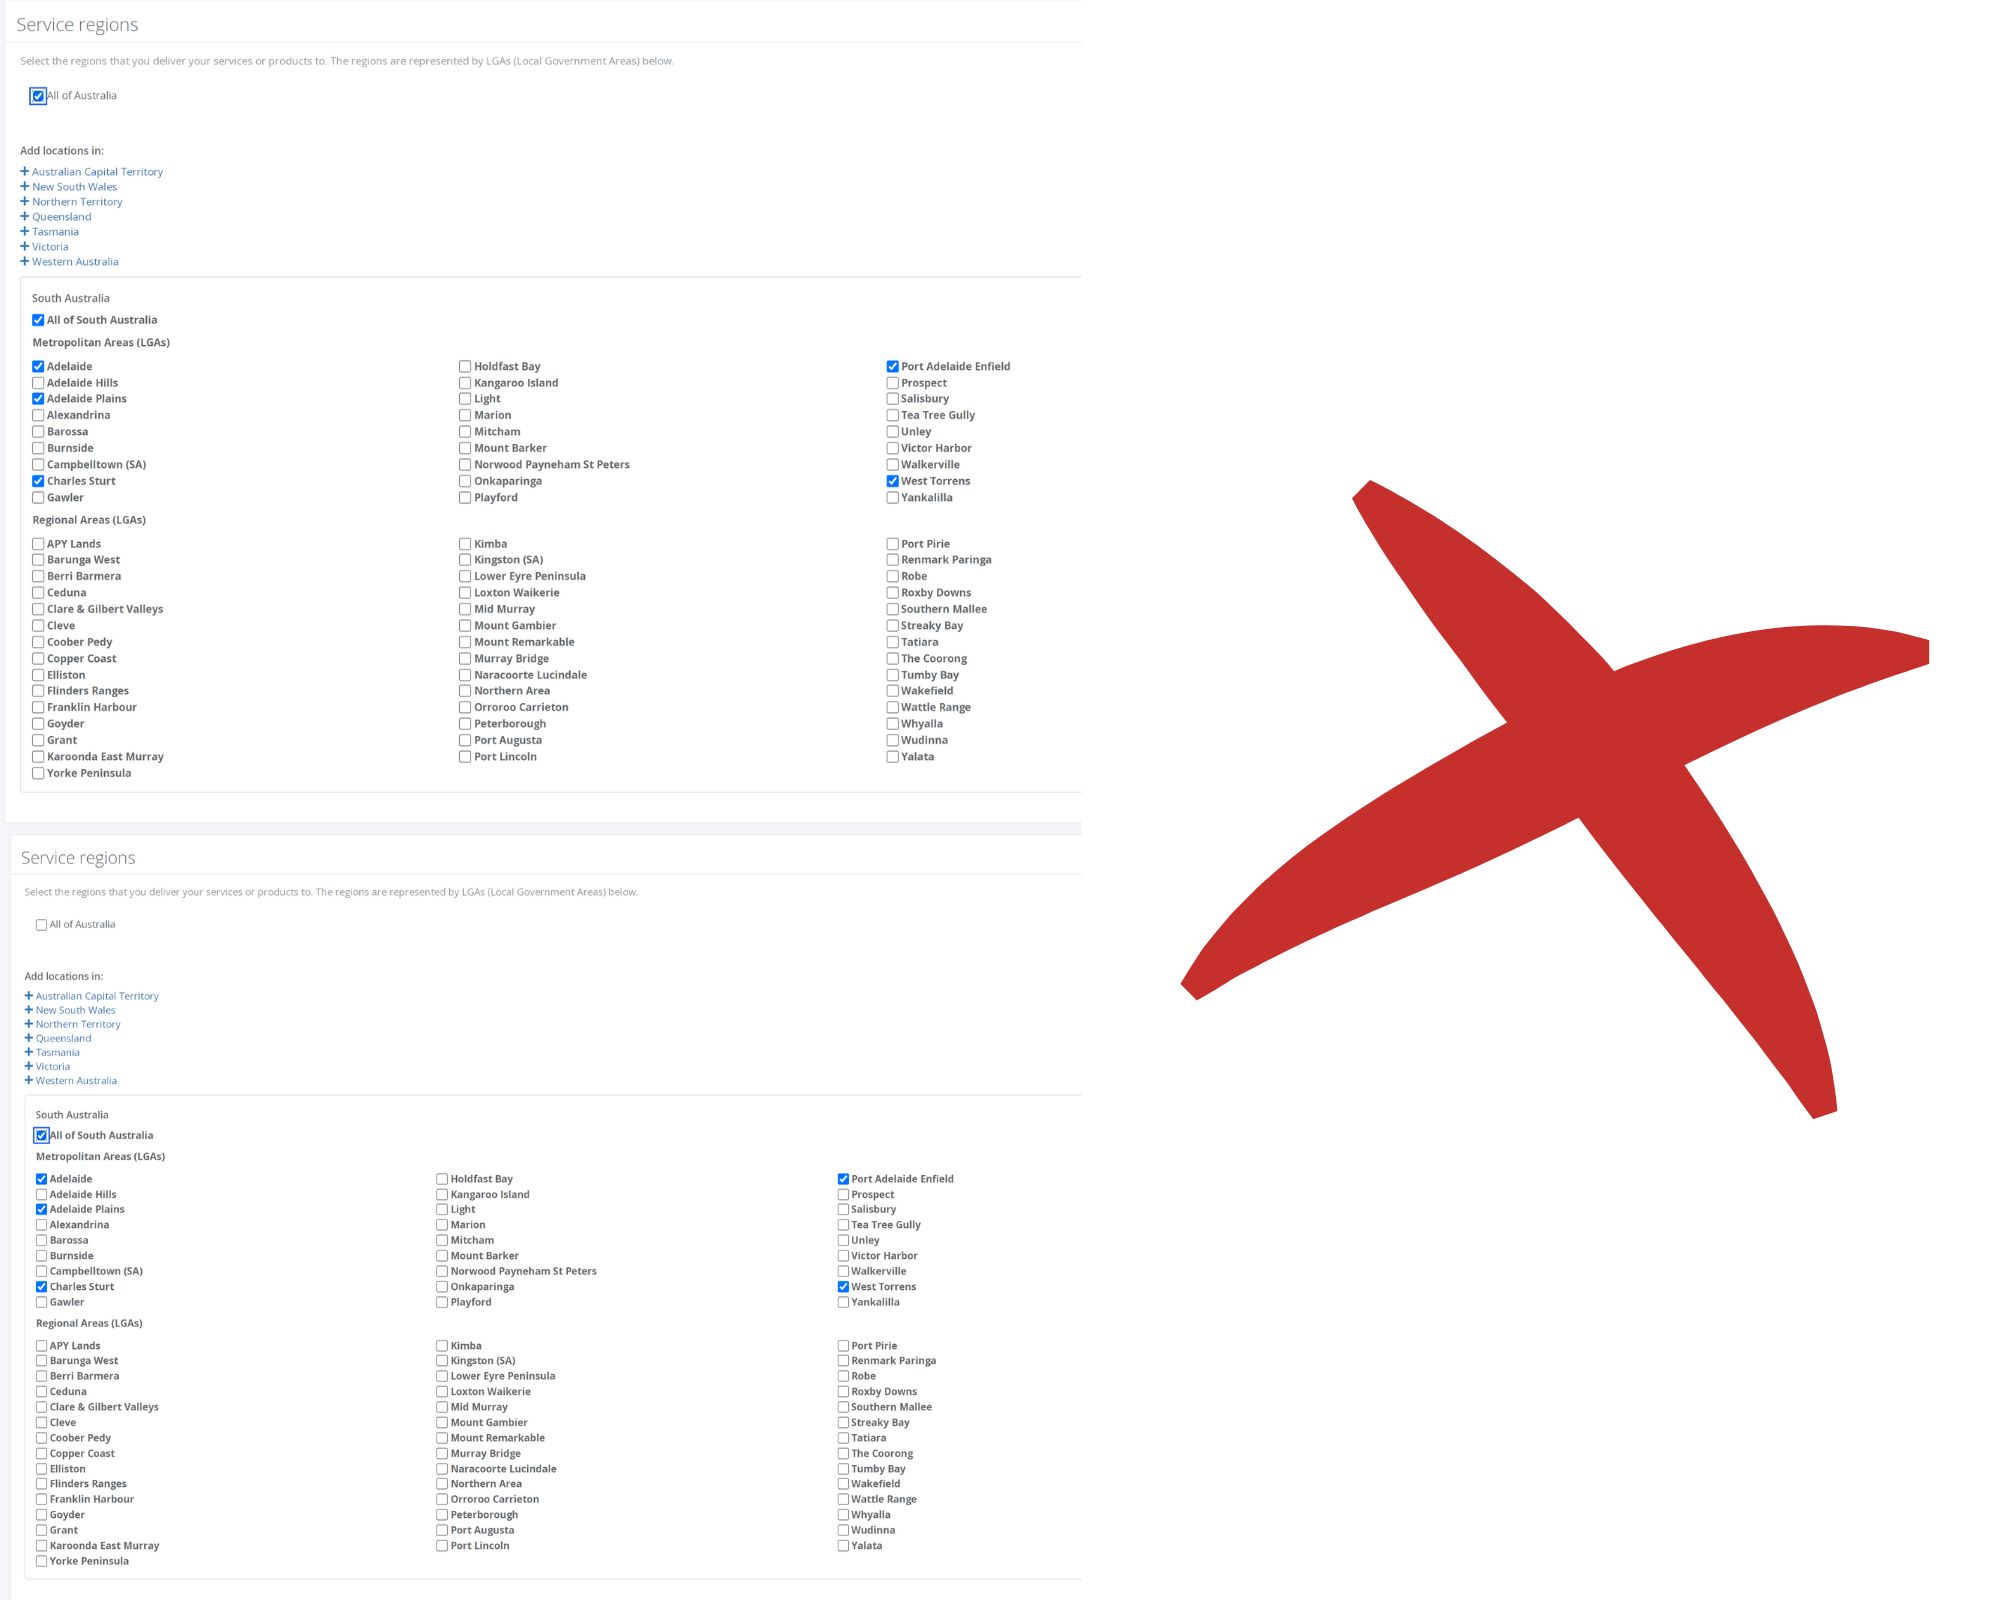
If you select Service Region you will need to select the areas that you service. You have the option to select All of Australia, All of a Particular State, or Individual State LGAs. You only need to select 1 option, ie if you select All of Australia you do not need to select individual LGAs or individual States.
11.
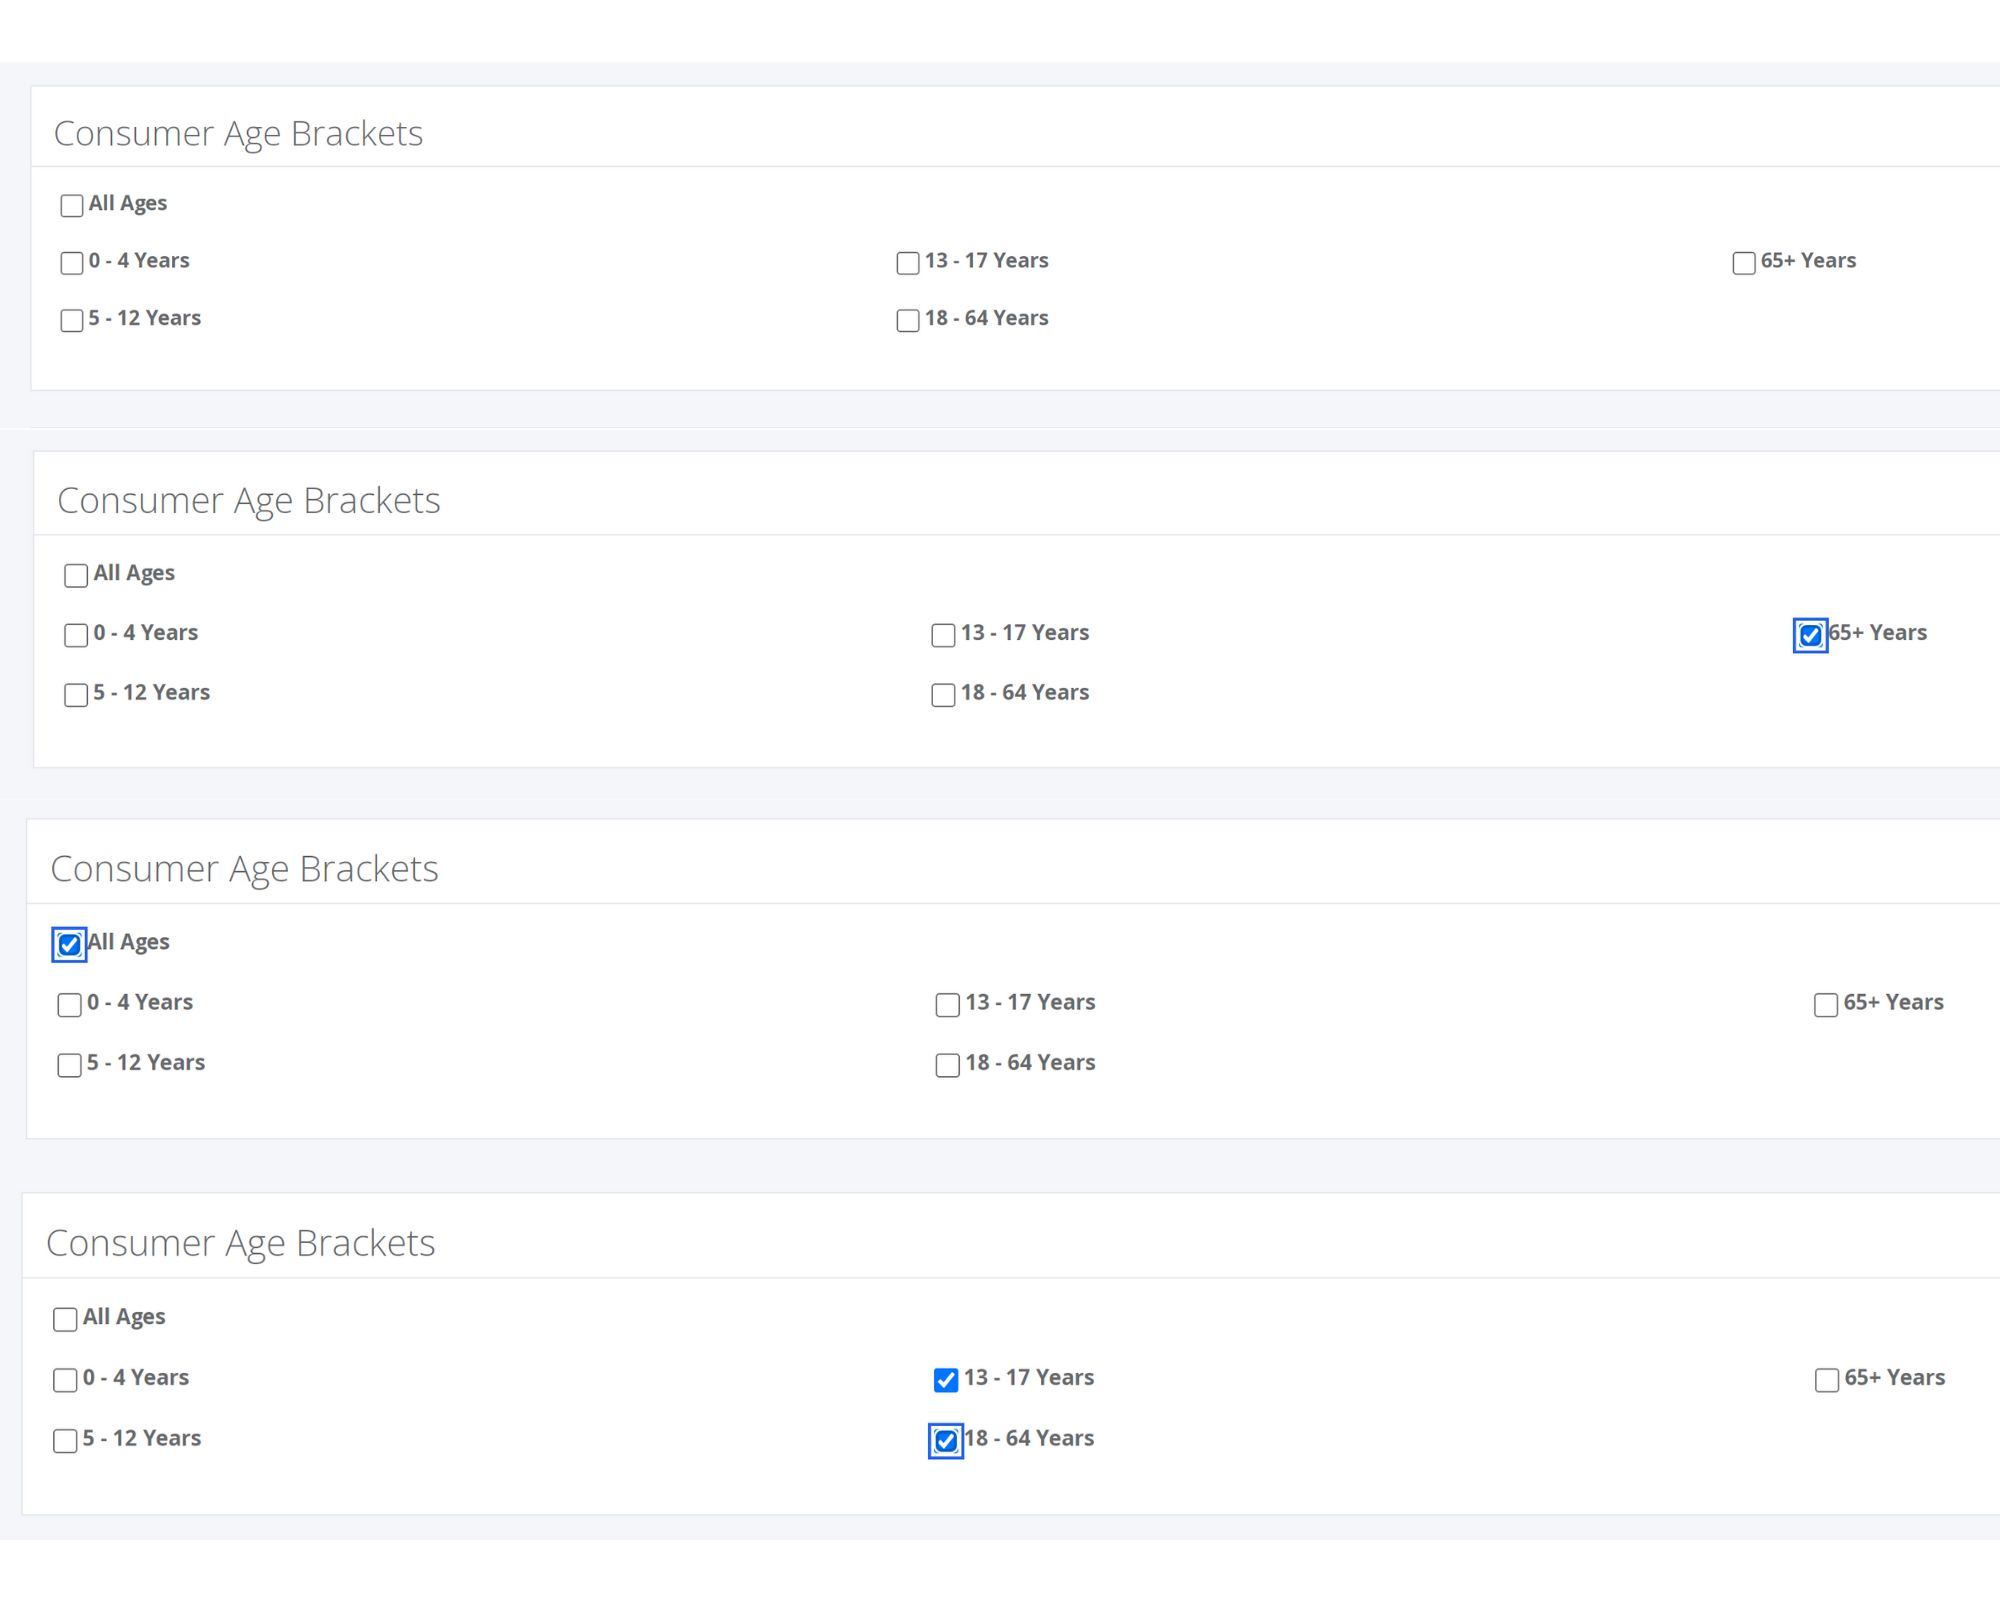
Next step is to select the Age Brackets you service. If you provide Aged Care Services only you can select 65+ Years or leave it empty. If you provide Disability Support Services we require at least 1 selection.
12.
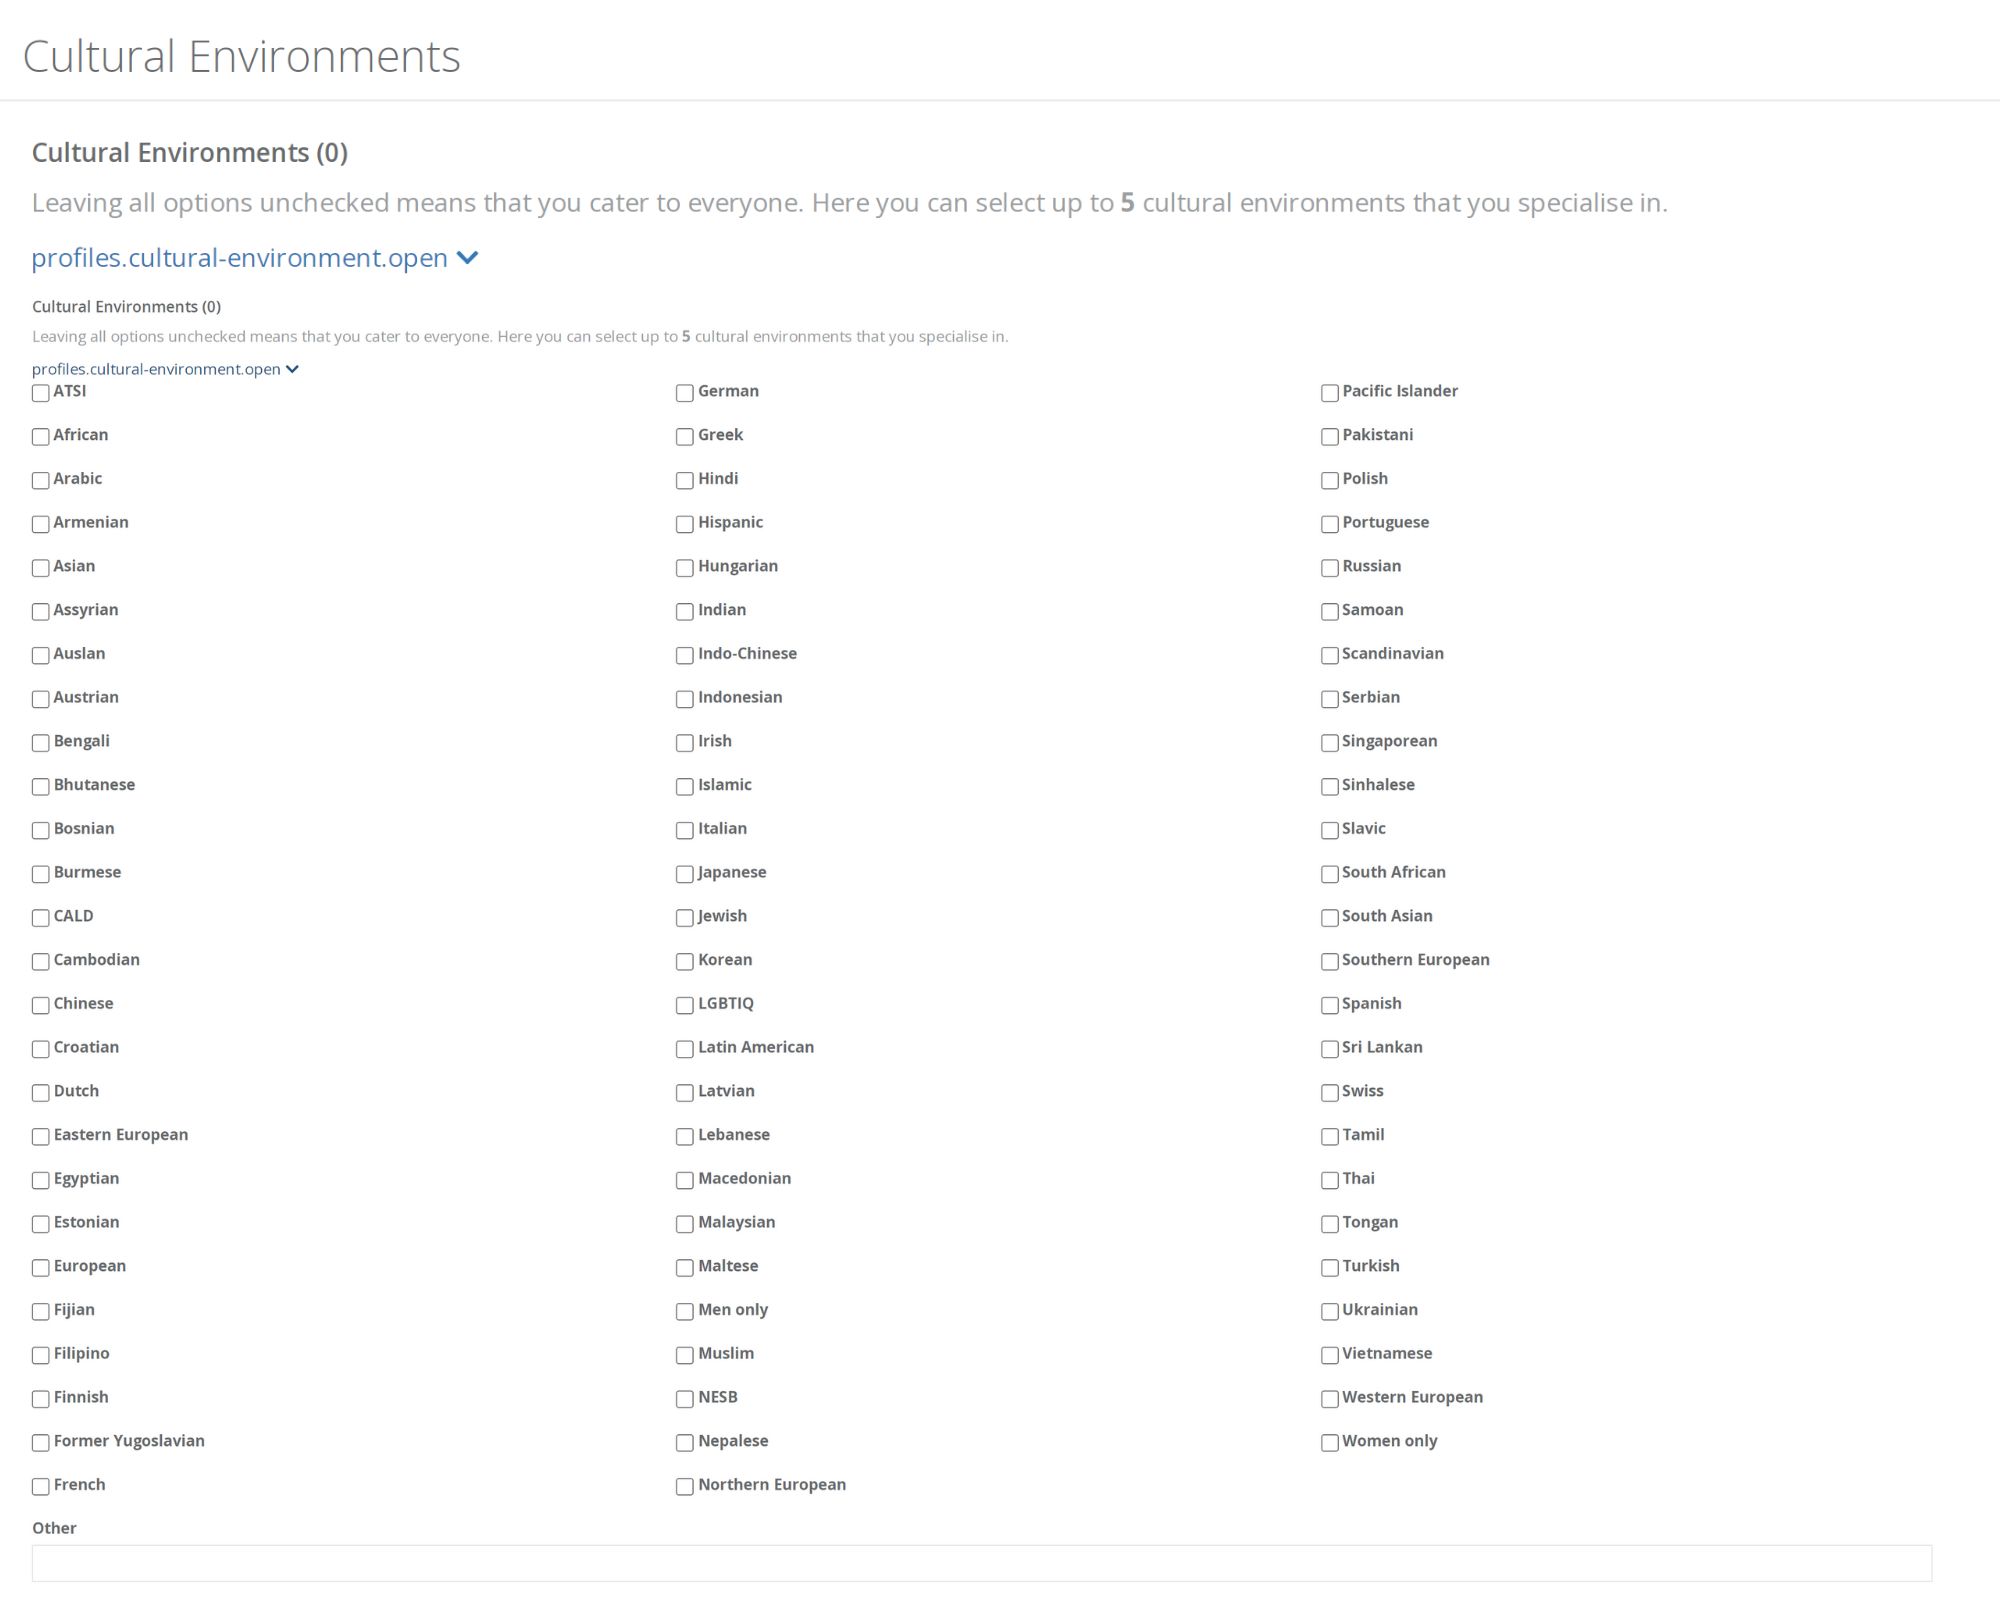
There is the option to include any specific Cultural Environments that you specialise in, for example you may have staff that speak Italian or may have a large number of residents that are all from the same Country. If you leave this section blank it means that you cater to everyone.
13.
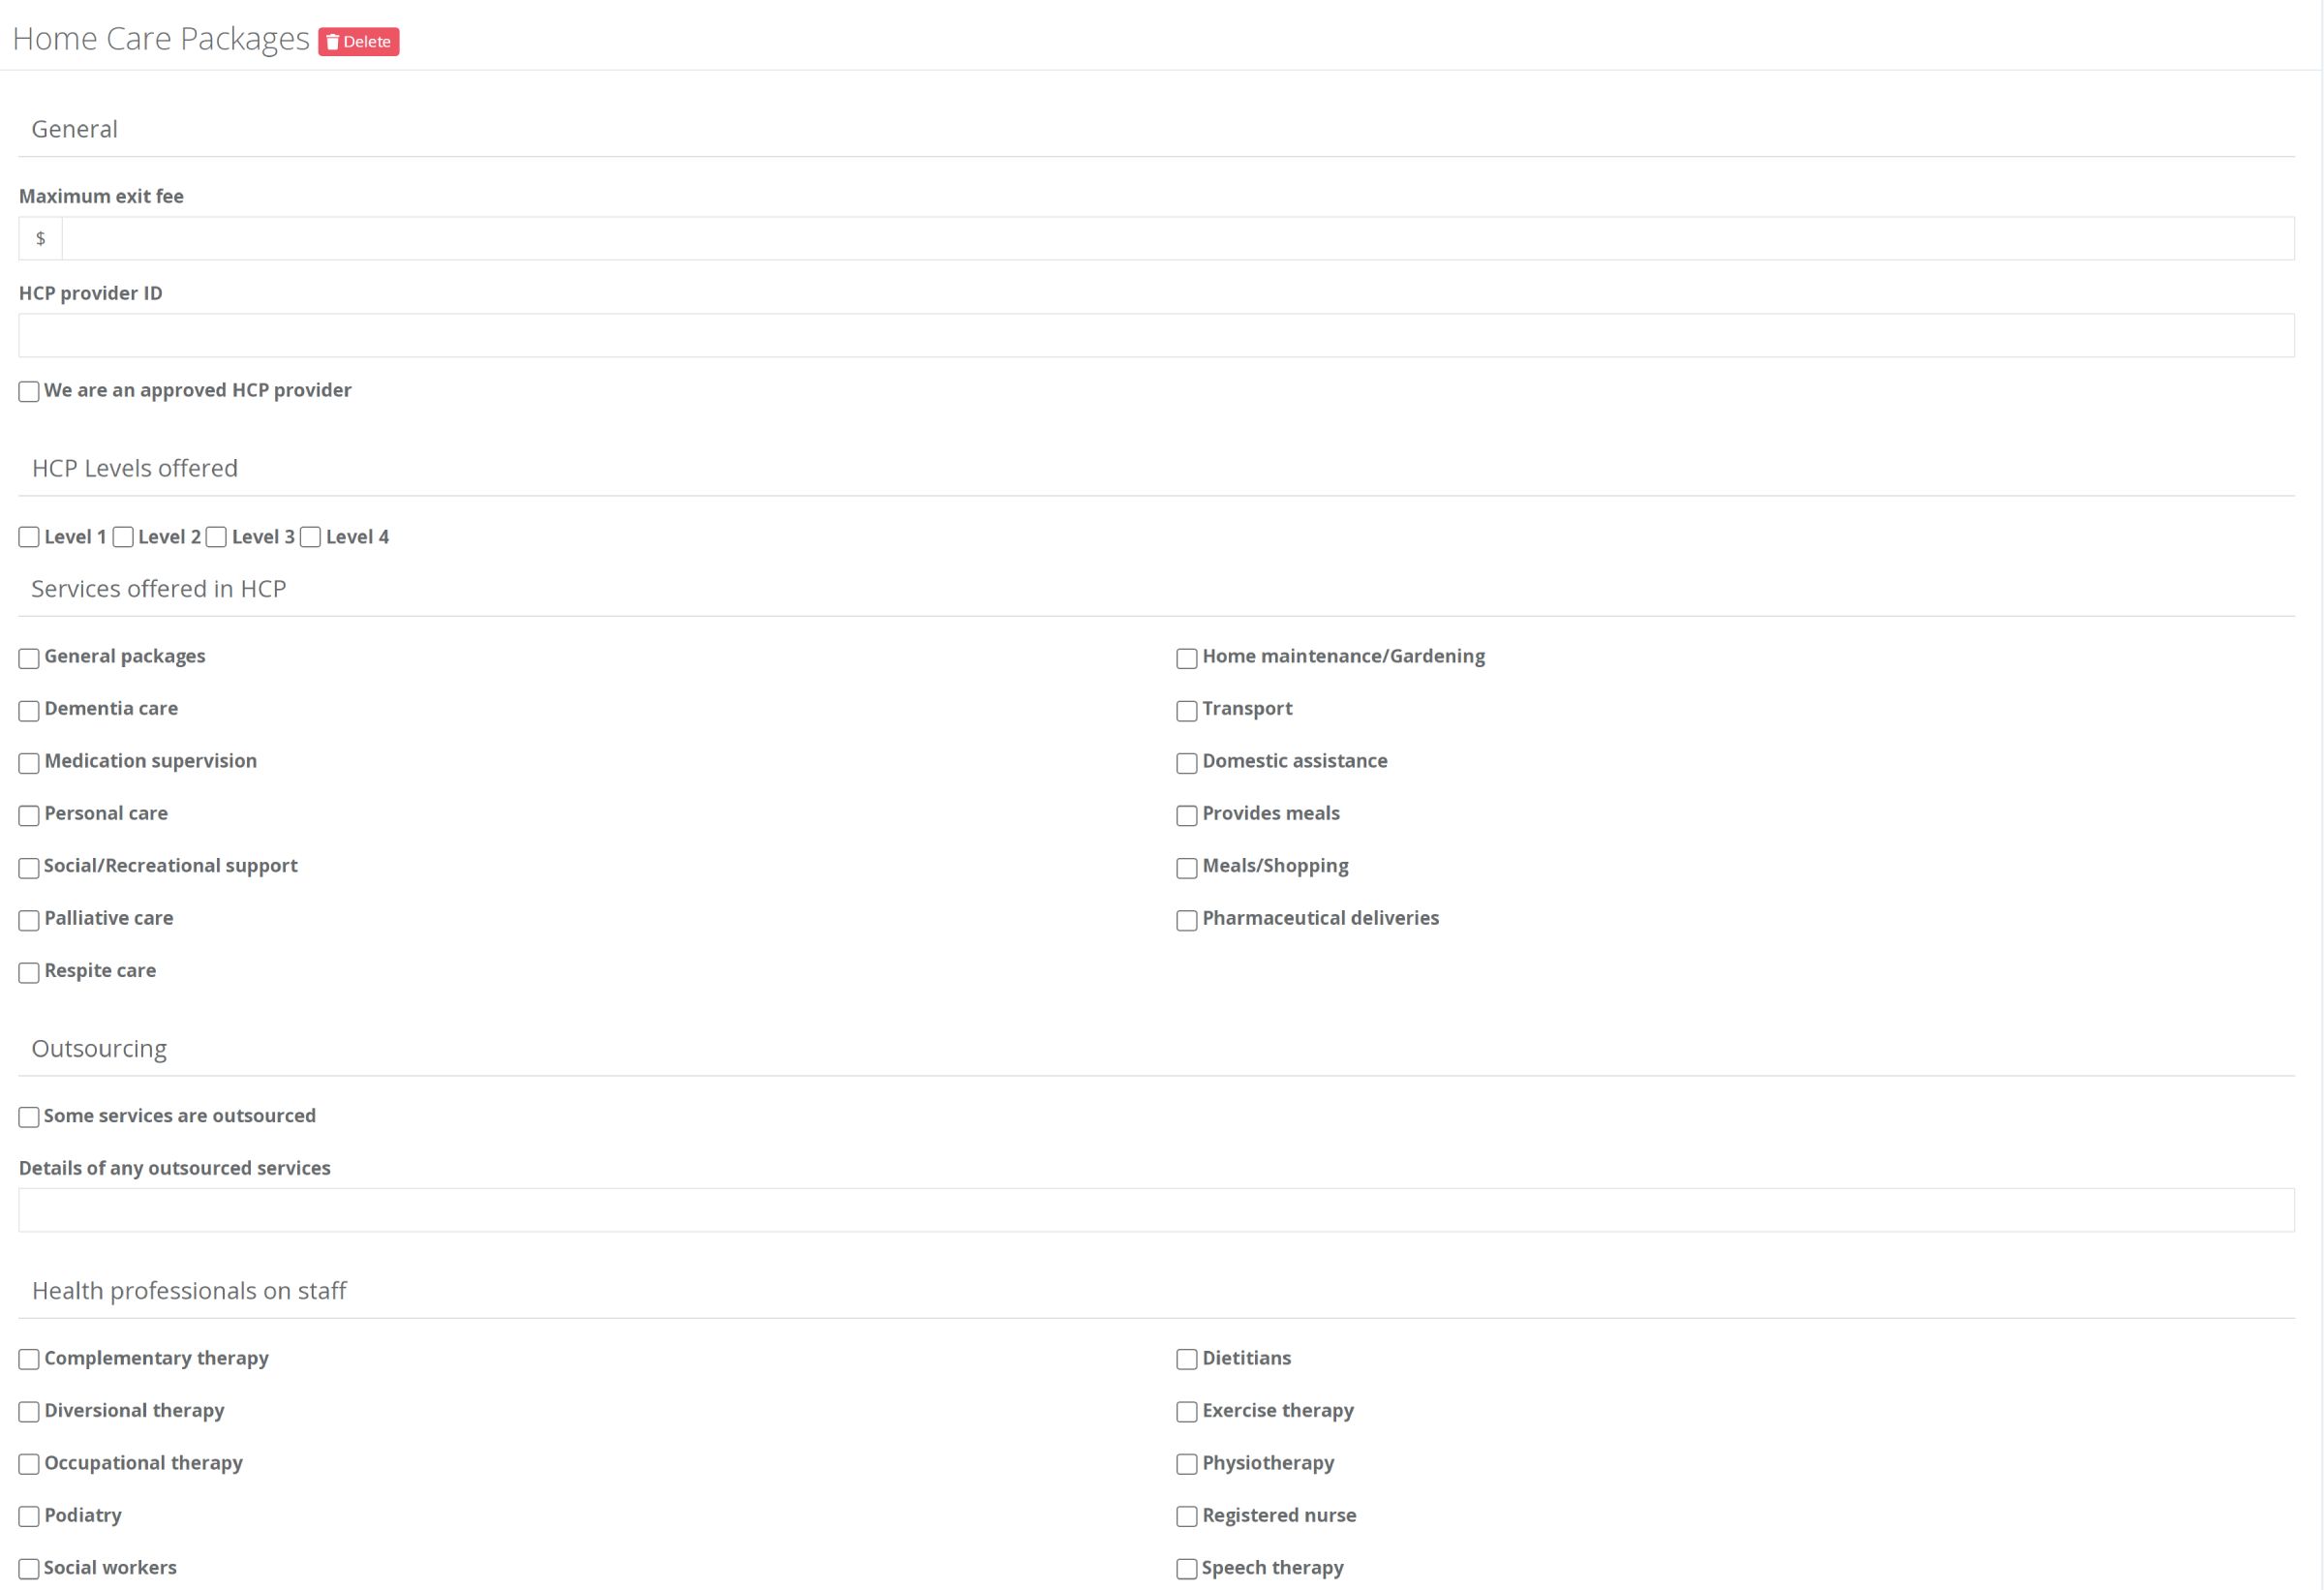
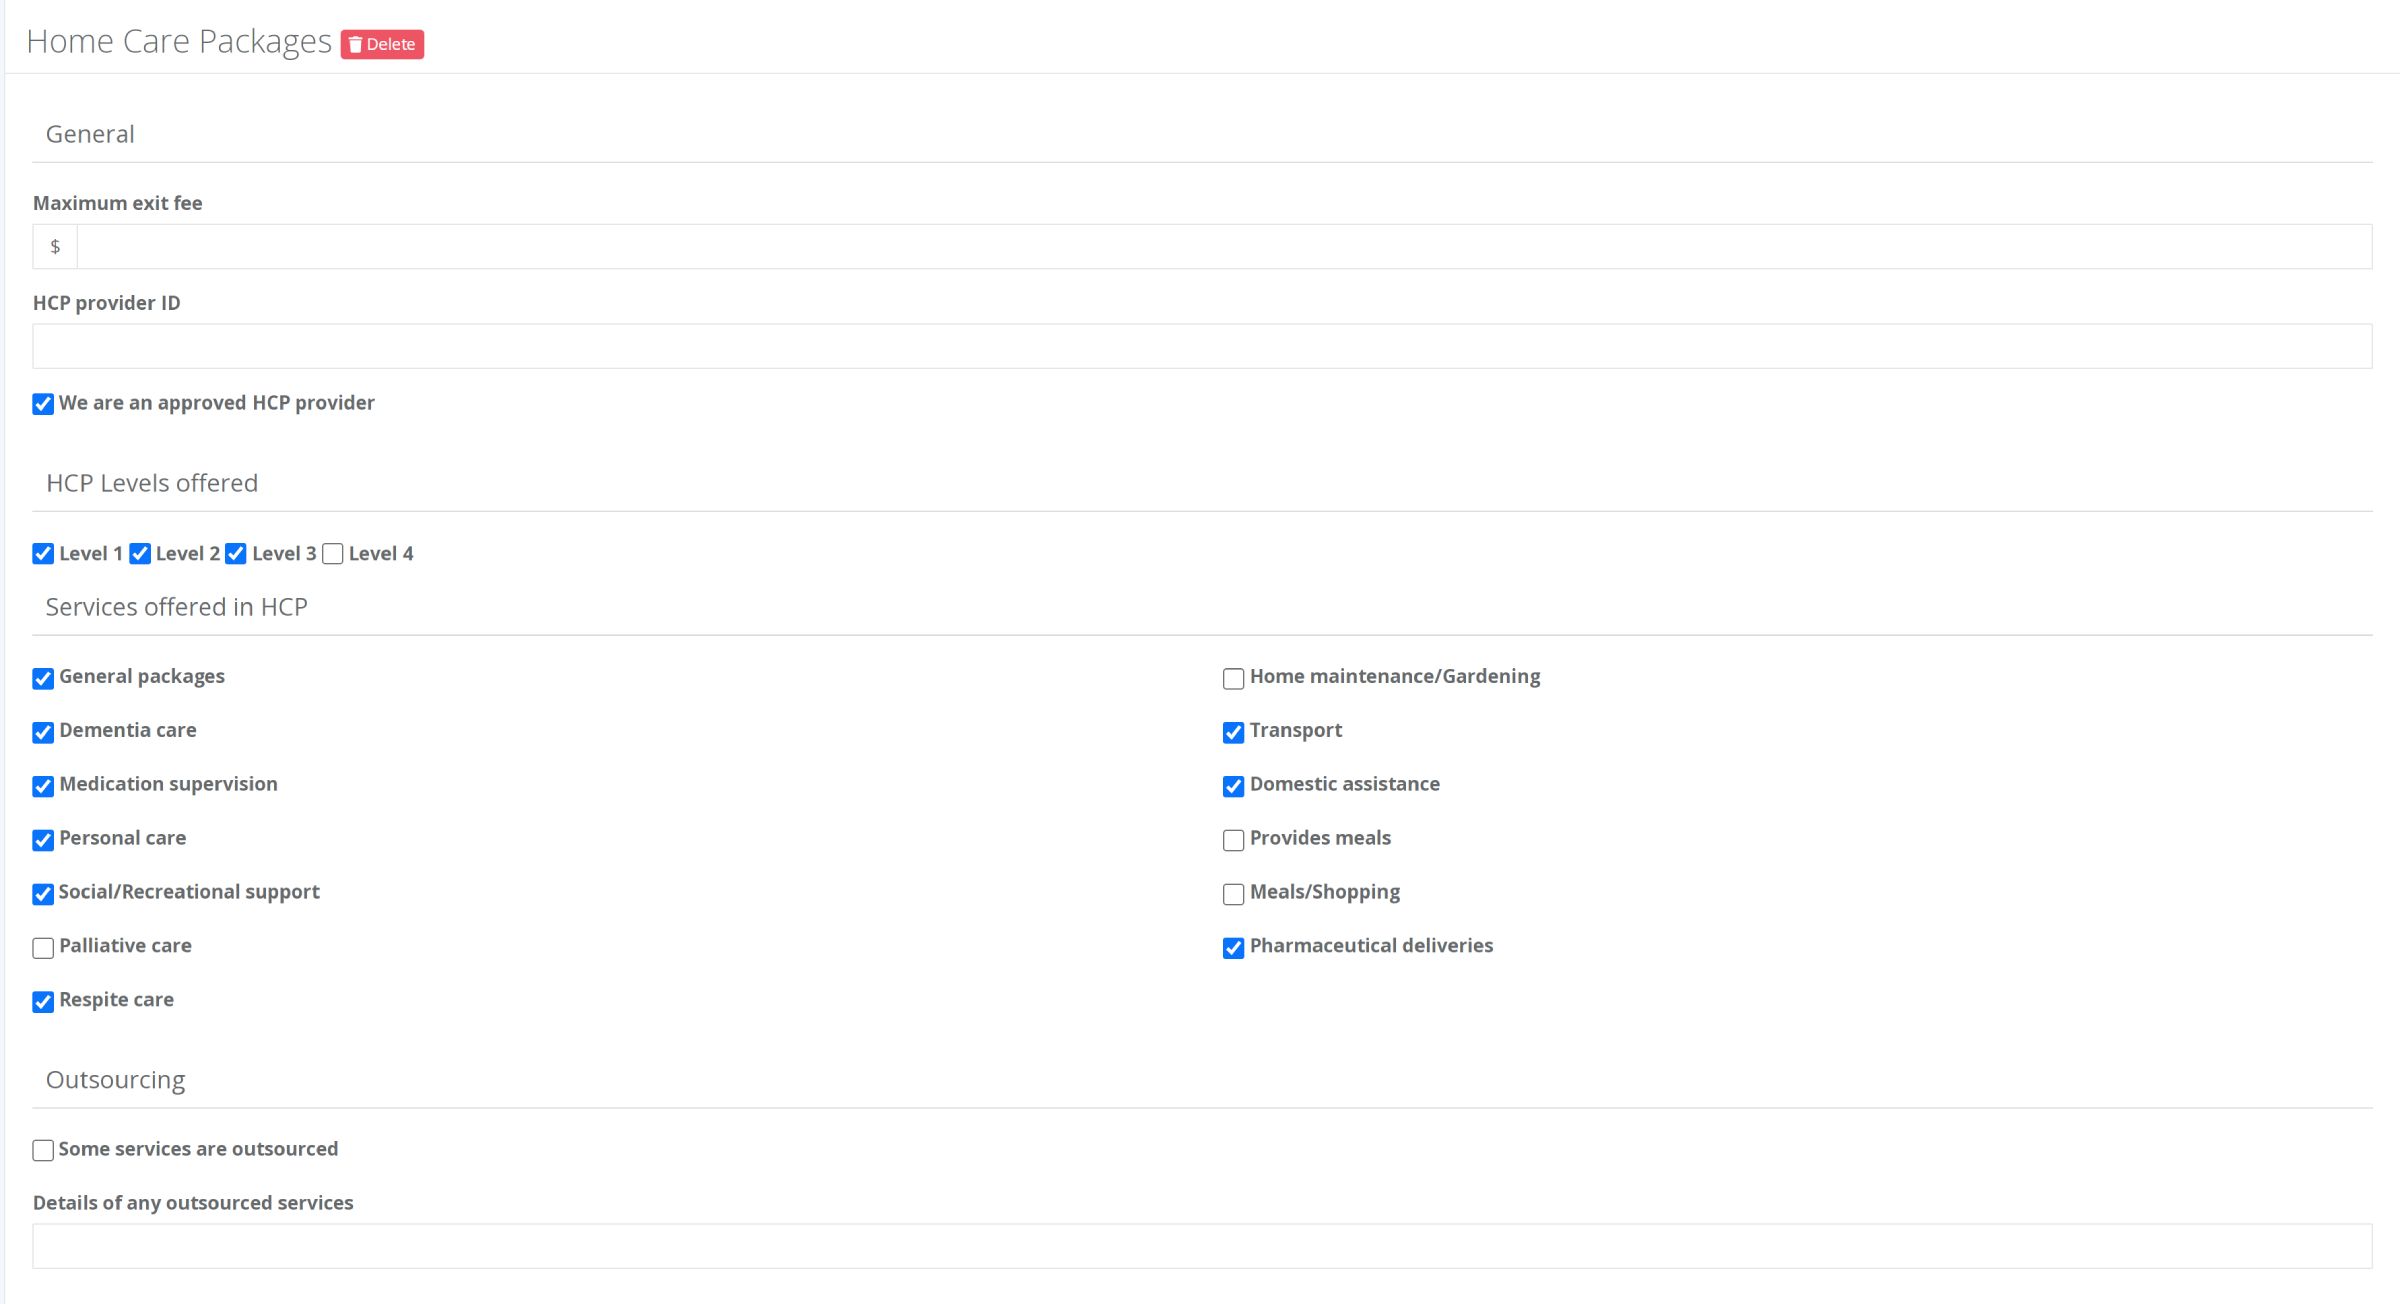
The next sections are where you are able to fill in information about the services you provide. The more details you provide, in the form of tick boxes and any notes with extra details in the note sections, the better to ensure that your profile is visible in all the searches for the services you provide.
14.
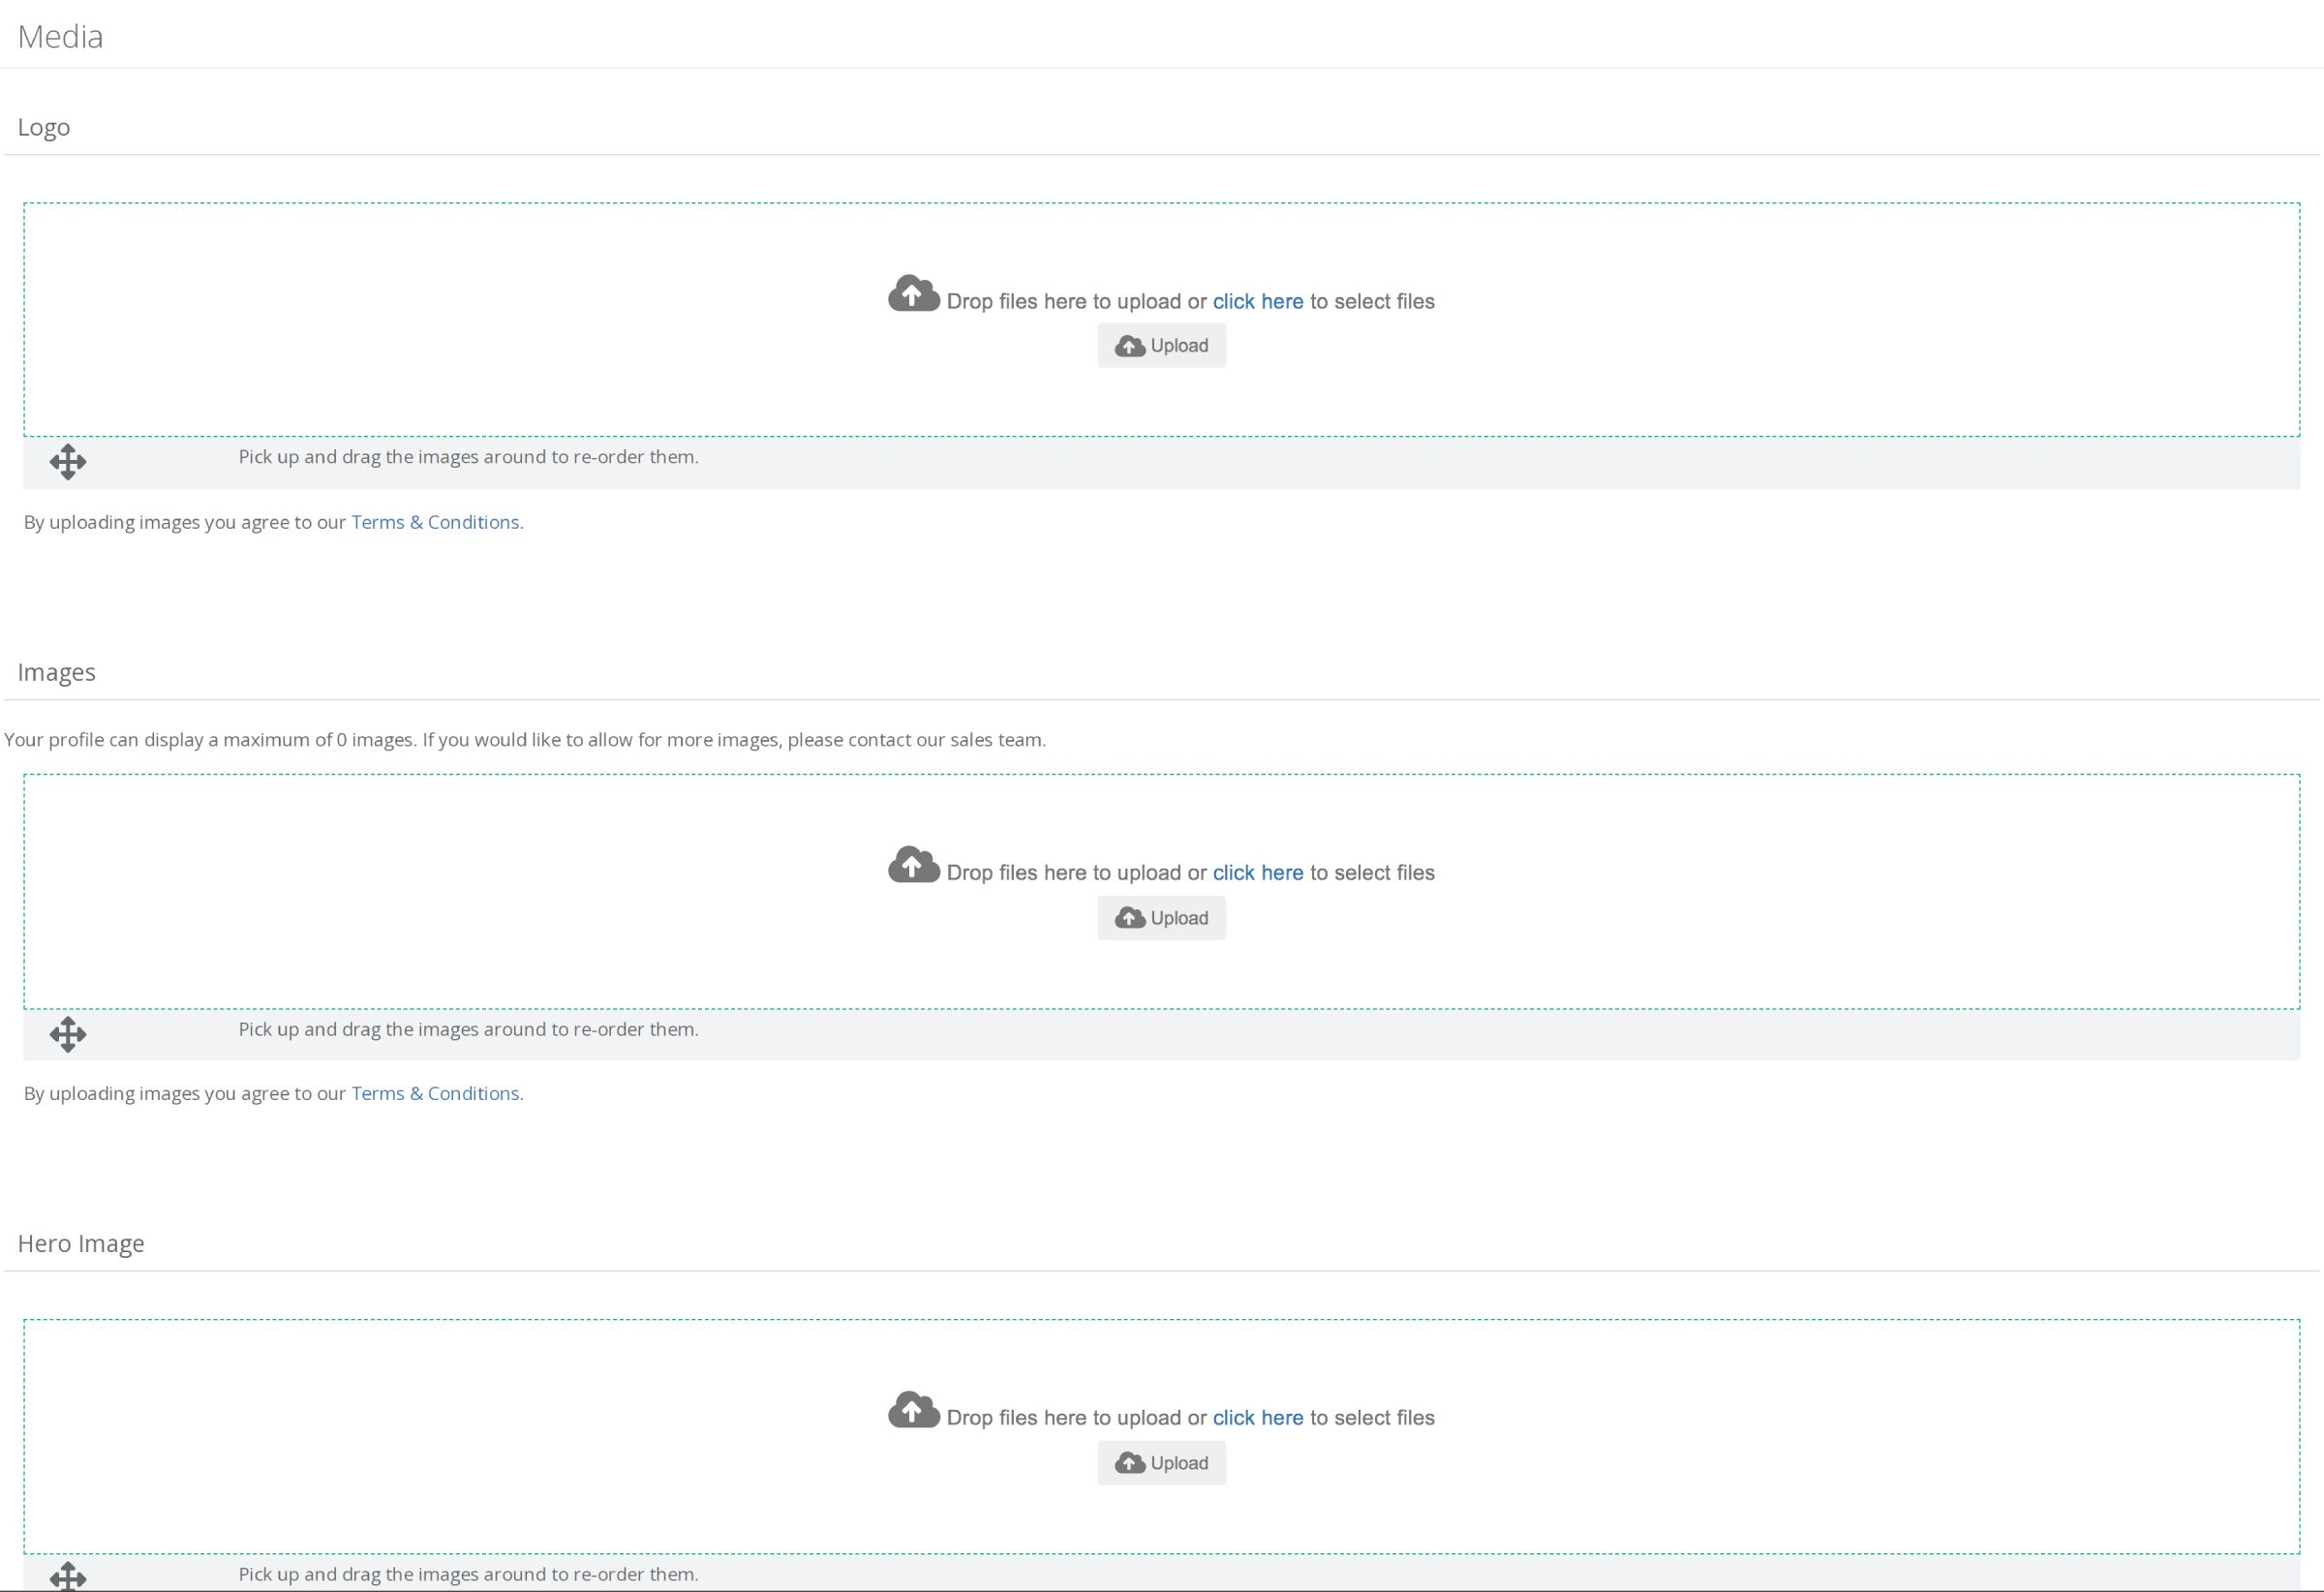
Profiles are able to add a logo, images, up to 20 images max, a hero image as well as Videos. For these to be visible online you will need to upgrade your profile to at least a Full Profile. You are able to upgrade your profile using the Profile Subscriptions option in the Left Hand side menu or contacting DPS directly.
When you are happy with the information showing on your profile press the green Save button and it will be visible on the website immediately.